

Last day, I have shown you how can you enable WordPress email logs on your blog. If you are offering some service or something like that, you might want to consider using an SMTP plugin for your blog.
For our users, we will always recommend the best one - WP Mail SMTP.
WP Mail SMTP can be configured with almost every email service like SendGrid, G Suite, Office 365, etc... Well, in this post, we are going to show you the WP Mail SMTP configuration with Amazon SES!
The simple and easy method for configuring.
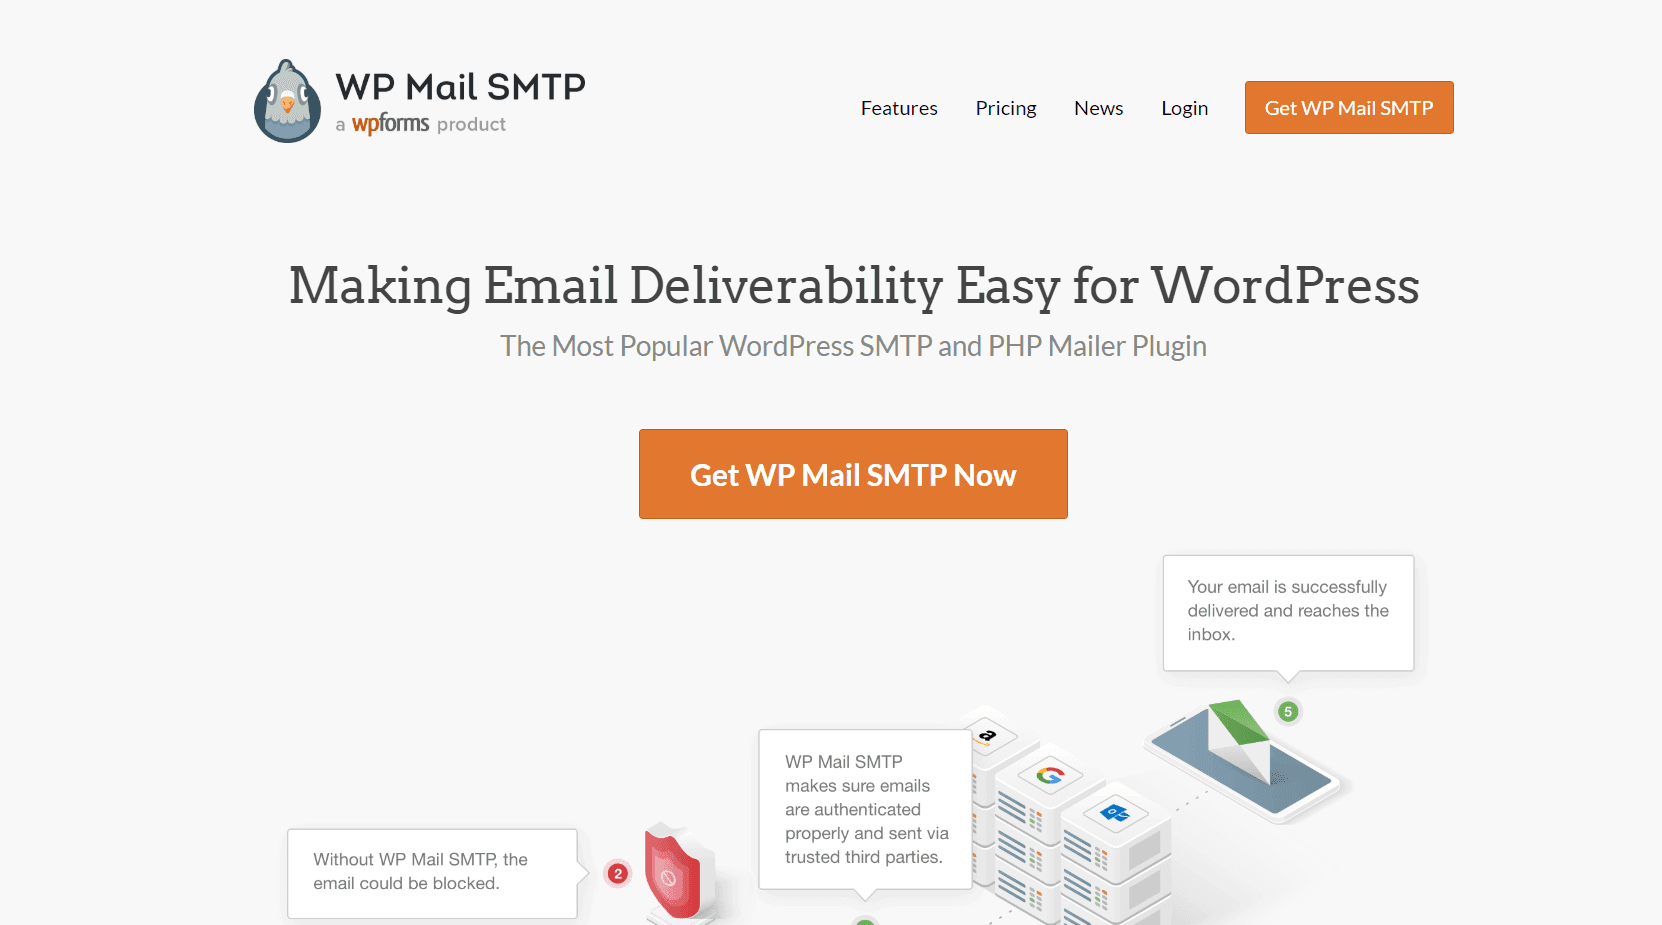
WP Mail SMTP

When you run a WordPress blog, you will come up with lots of errors and issues. Something like MySQL database error, WordPress admin keeps refreshing, etc... One of the top issues is - email not being delivered properly.
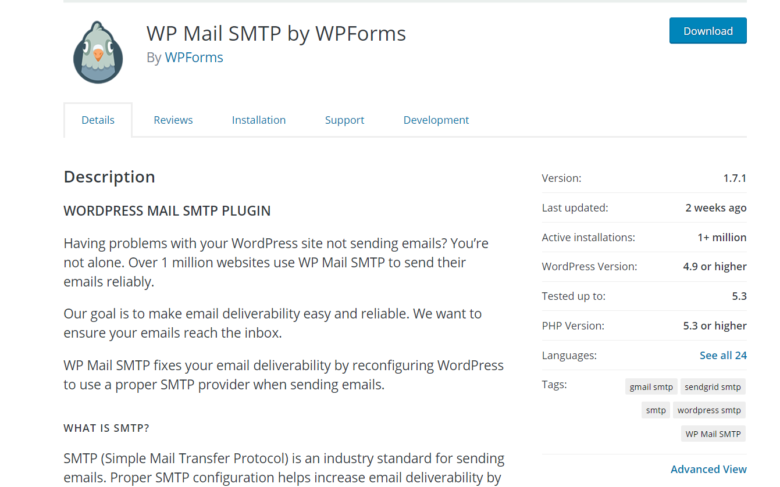
For avoiding it, the folks from WPForms created WP Mail SMTP. Now, it is one of the best and popular SMTP plugin for WordPress. Thankfully, they created it as a freemium option.
A free version is available which can be downloaded from the WordPress plugins repository and a premium version that can be purchased from their official store.
If you check the repository, you could see that there are more than 1 million WordPress blogs are using it!
Cool, isn't it?
The premium version will give you more advanced features and integrations. So, we could go and check the WP Mail SMTP configuration for Amazon SES!
WP Mail SMTP Configuration For Amazon SES
First of all, you need to get the premium version of WP Mail SMTP for the Amazon SES integration. You could purchase any of their premium plans for this integration.
If you are interested, we recommend you WP Mail SMTP Elite plan. There, the support team will help you to configure the plugin for you - almost free!
Anyway, once you got purchased the plugin, log in to your WordPress blog, install and activate it. For receiving plugin updates, you might want to activate the copy with a valid license key.
Alright. Now, let's create an AWS account.
Go to this link and sign up for Amazon AWS.
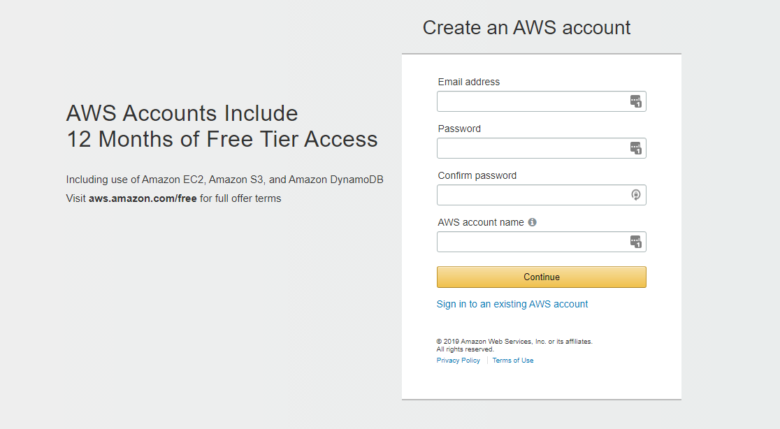
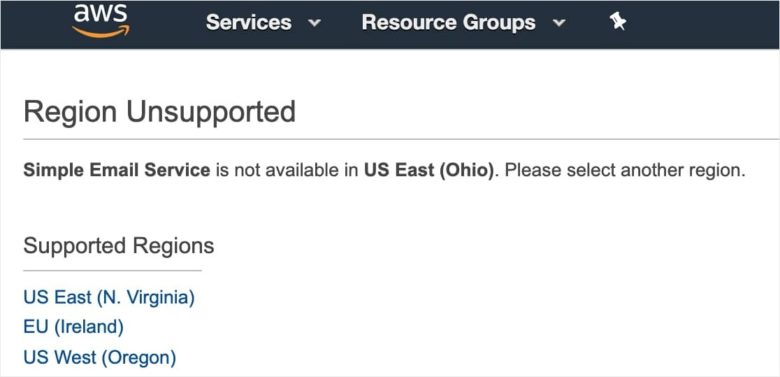
You would want to enter your credit card details. But, the service is totally free for the first 12 months. The next step is to choose a region.
According to your address, the system will automatically assign a region for you. If you haven't got one, there's a list of available regions you can choose.
Once you got chosen the region, you have successfully configured your AWS account! Let's move to the next step now.
Assign IAM User
Head over to this link.

You don't need to create another account here. By using your Amazon AWS credentials, you can sign in to your IAM account. After signing in to the account, add a new user.
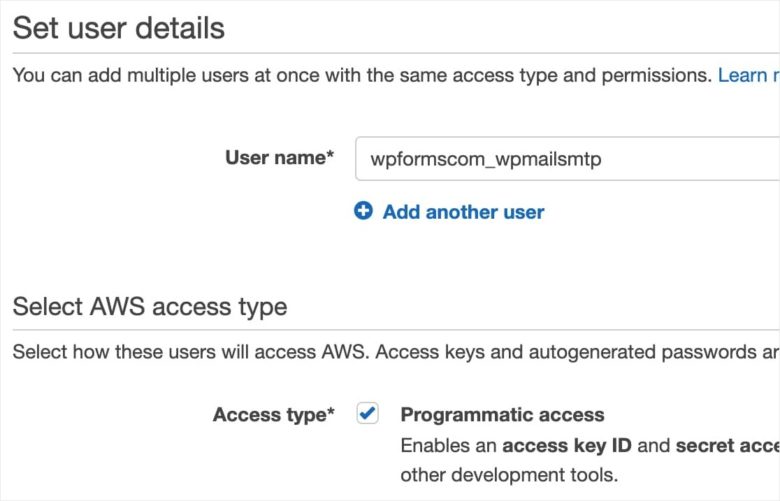
Add the user name something like domain_wpmailsmtp. Make sure that you have assigned the access type as programmatic access. Let's configure the permission now.
From the top, select attach existing policies directly. In the search bar, search for AmazonSESFullAccess.
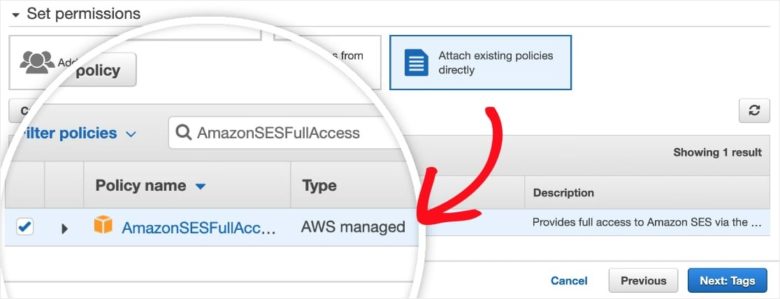
Make sure that the permission is assigned to your newly created user. Move to Tags settings. We don't need major changes there. So, we could skip that configuration, move to the next - Review.
Your entire configuration will be shown on this page.
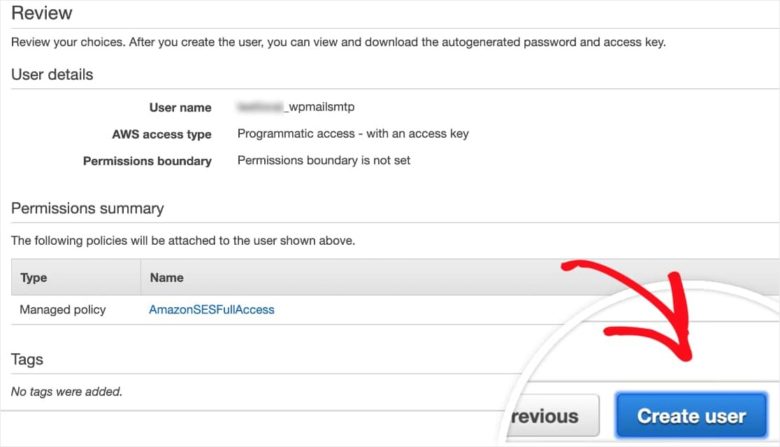
Double-check everything. If everything is correct, create the user. Within a few seconds, your new user account will be created. Also an Access Key ID and a Secret Access Key. These keys are required later. So, you want to keep this tab alive.
Switching To AWS Production Mode
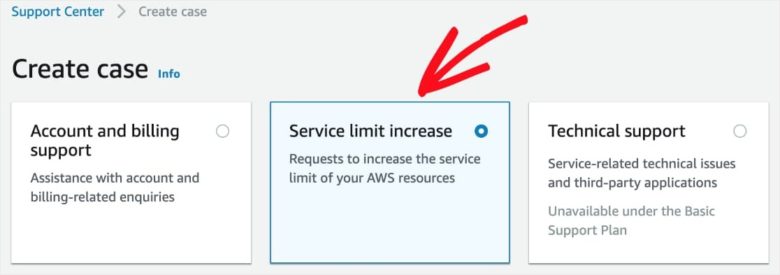
By default, you will not be in the production mode in your Amazon AWS account. You will be able to only send and receive emails that are verified in your Amazon account.
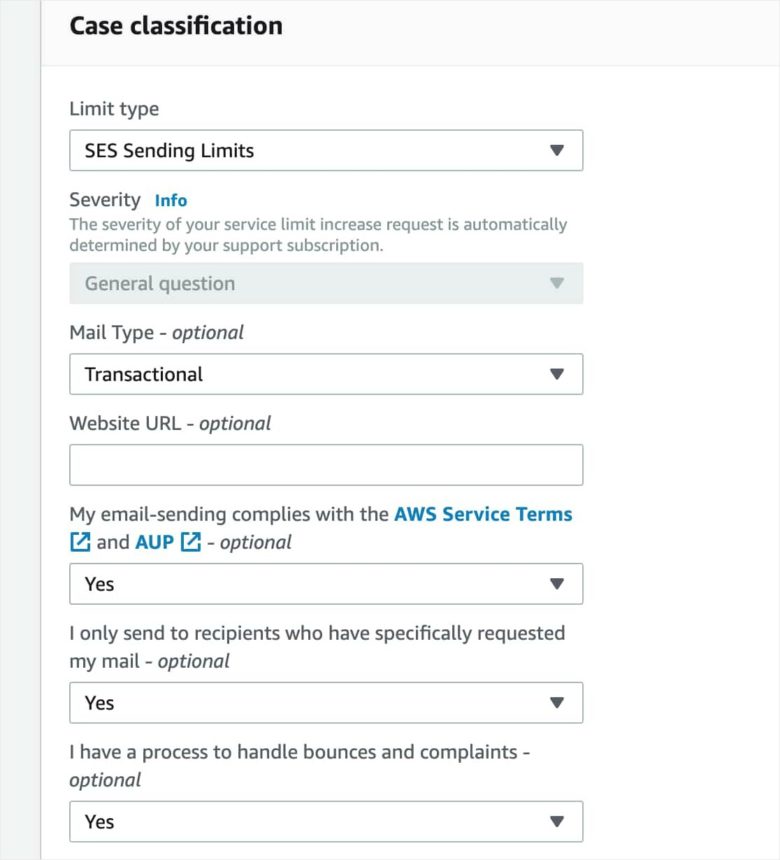
When we need to move forward, we need to upgrade our AWS account to live. For that, click on this link and choose the service limit increase option.
Configure the form like this:
Plus, there is a field for entering the case description.
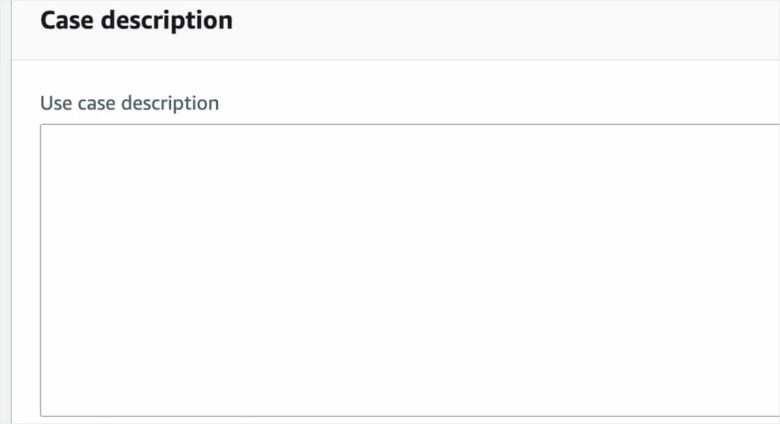
You need to be descriptive. Add why this is important for you in a strong manner. If you send incomplete descriptions, they will simply reject your request. Now, we are good to go.
Go to your WordPress dashboard and to the WP Mail SMTP settings. Choose from email.
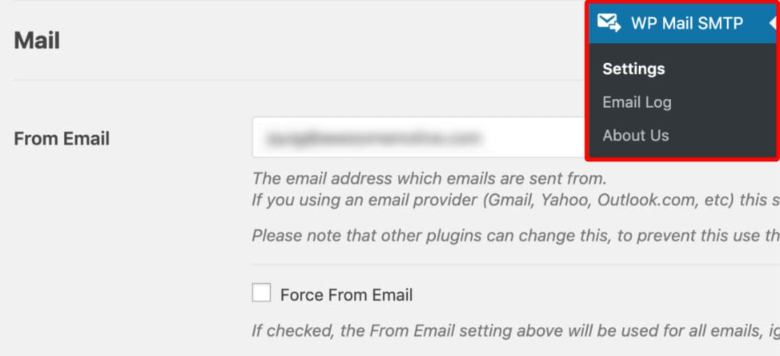
By default, the system will show you your administrator email as from email. You could always change it to a custom one. If you like, you can force the email site-wide.
Now, choose the name.
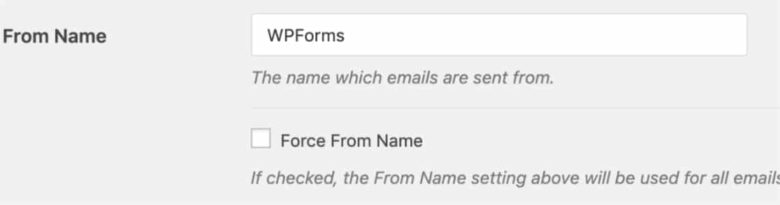
Just like the email, possible to change and force.
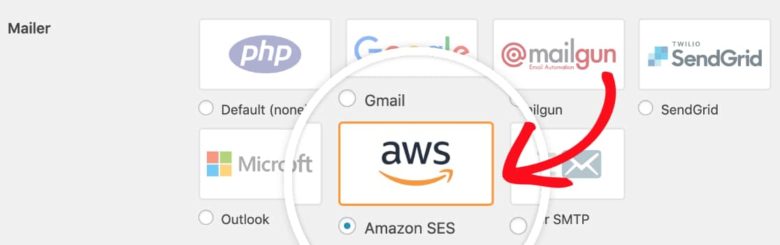
Select the Amazon SES mailer option from the screen.
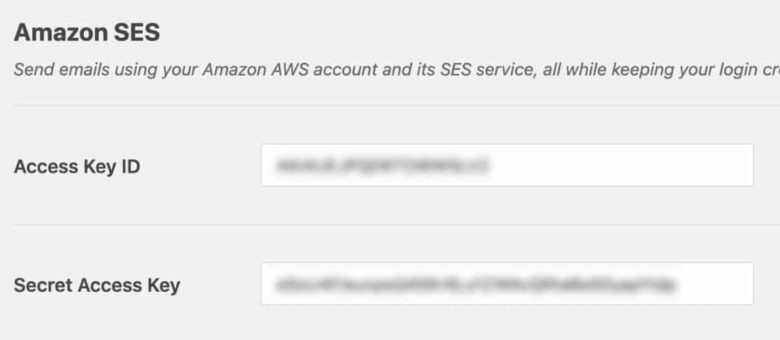
After selecting the SES option, you will see something like a new section for entering some keys. From our Amazon AWS account, copy the Access Key ID and Secret Access Key.
Choose the region.
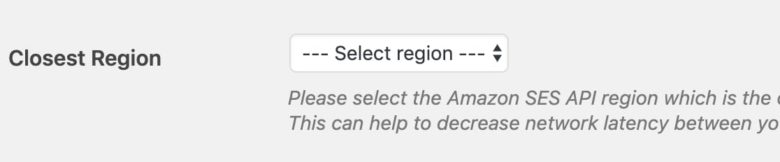
We have already configured a region in our Amazon AWS settings. So, make sure that we have selected the same here for avoiding conflict.
Simply save the settings.
You will see a new settings called verified emails. Click on it for adding new emails.
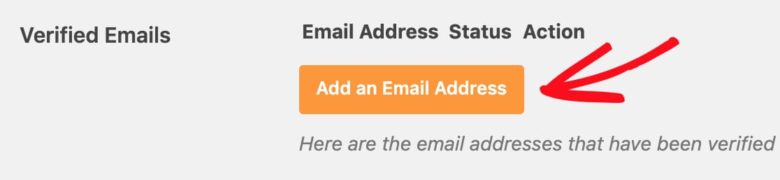
A pop-up will appear. You can easily add your email address and send the verification email.
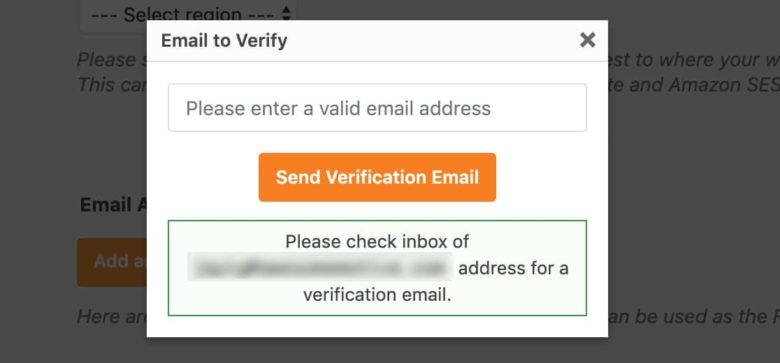
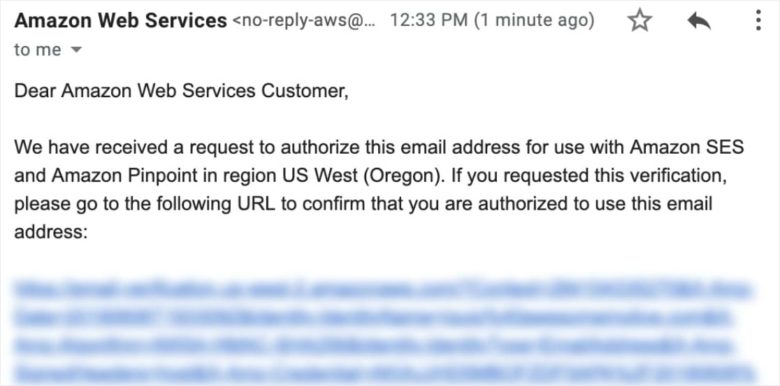
In your inbox, you will get one verification email. You need to click on the link for verifying it.
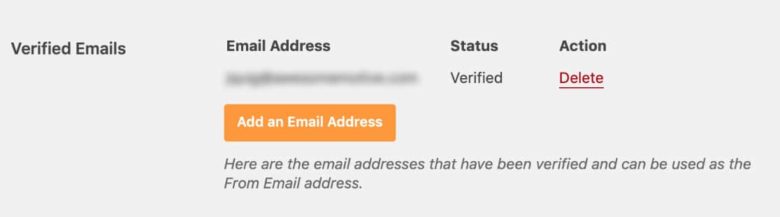
After verifying, you will see the email address in your WP Mail SMTP settings!
Testing Configuration
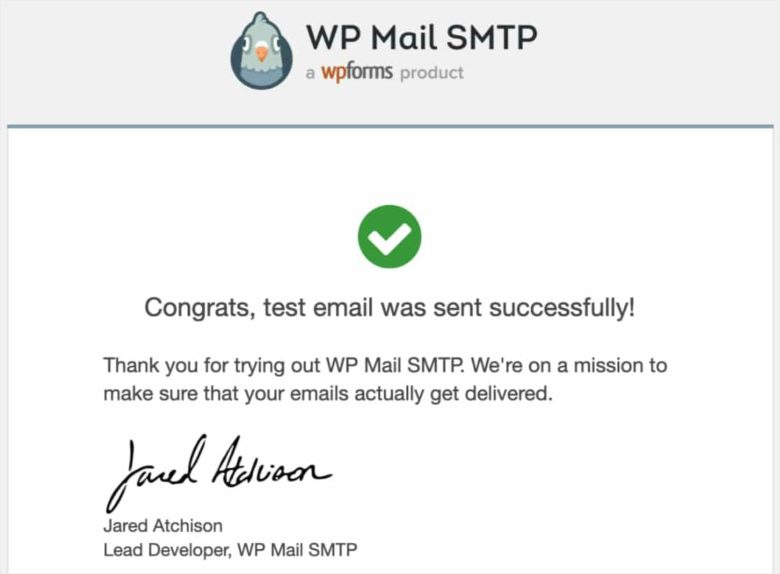
There's an easy method available for testing the configuration. Go to the email test settings in your WP Mail SMTP settings.
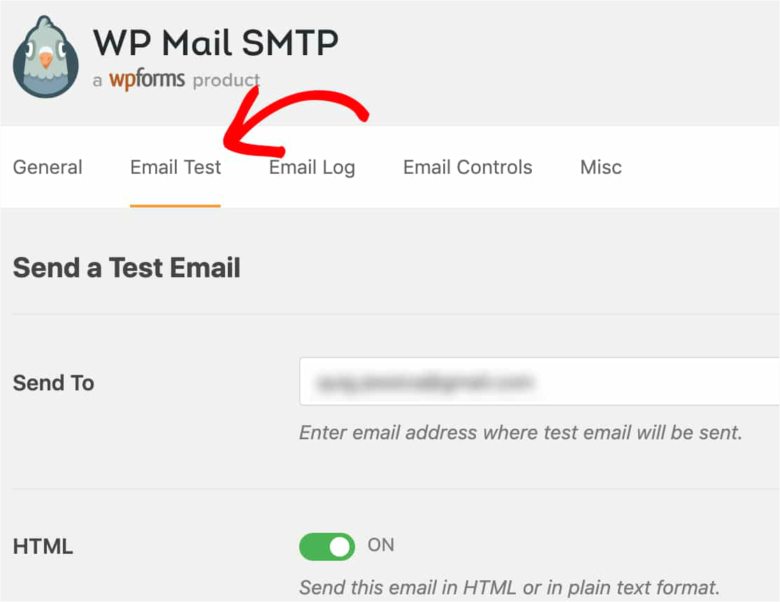
Enter a destination email and simply send a test email. Your server will send the email within a few seconds and will show you a success message.

If you have the right configuration, a test email will reach in your email inbox!
That's it!
This is the WP Mail SMTP configuration with Amazon SES! WP Mail SMTP comes with a 14-days money-back guarantee. So if you are not happy with your purchase, you can easily ask for a refund.
In most cases, you won't go for a refund.
Have you found this post helpful? If you did, please consider sharing this post with your friends and fellow bloggers on social media. For more related posts, you could check out our blog.


Responses (0 )