

Managing multi-author WordPress blogs is a daunting task, this is the point where the idea of the frontend submission of articles and blog posts can play a significant role. Indeed, it is an easy way to manage several authors without giving them WordPress backend access. In some case, this is an excellent idea.
Many WordPress blogs can't just grant the backend admin panels access to their authors/users due to different reasons like security, presence, impression, etc. so here comes the use of front-end publishing. But How?
There are many plugins out there in the market for Front-End Posting, and I almost tried all the plugins. The issue with the majority of plugins is their lack of basic features like setting up custom fields, meta boxes to fill up SEO details, etc... Sometimes, we need to publish custom post types or even need to set up comment management from the front-end for authors.
So after doing detailed research and trying almost all the plugins, I came up with the most robust and advanced plugin for managing multi-author blogs. Yes, I am talking about WPUF (WordPress User Front-End). This Plugin is developed by Wedevs.com and is a top-notch tool for front-end publishing among its competitors. No other plugin in the industry offers the same features.
It comes in two different versions. WPUF Free Version and WPUF Pro Version.
First, take a look at between features of both versions of this plugin.
Free Features
- The user can create a new post and edit it from the frontend
- They can view their page in the frontend custom dashboard
- Users can edit their profile
- Administrators can restrict any user level on accessing the WordPress backend
- New posts status, submitted by users are configurable via the admin panel. i.e. Published, Draft, Pending
- Get email notification of new posts
- Configurable options give access to the user to edit or delete their posts
- Upload attachments from the frontend
- Upload post featured image
- Admins can manage users from frontend
- Pay-per-post or subscription package for posting
In case you would like full access to all features, here is what the Pro version comes with. (includes free features + all these)
Pro Features
- Unlimited post type form creation
- Drag-n-drop form builder
- Custom taxonomy support
- 13 variations of custom fields
- Guest post support
- Custom Redirection
- Image upload on post content area
- Post status selection on new post and edited post separately
- New or edit post notification
- Custom fields are also generated in the admin area
- Profile form builder
- Different profile edit forms for different user roles
- Drag-n-Drop profile form builder
- Profile fields are also created on the backend
- Avatar Upload
- Frontend profile edit
- Registration form builder
- CAPTCHA Support
The WPUF pro version is worth it, and This WPUF review will showcase the pro features with live screenshots. Let's have a deep insight into the world of WP User Frontend. I am explaining WPUF Pro in this tutorial, but you can download the free version as well to get to know it yourself.
How to Install WP User Frontend?
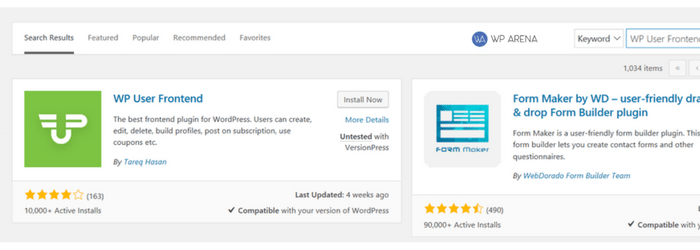
First of all, you have to visit the WordPress.org Plugin Directory or WeDevs.com dashboard (For the Pro version only) to download the WP User Frontend. My way of downloading a plugin is through the admin dashboard. Navigate to your plugins menu in the left side panel and click on Add New plugin.
Enter this exact text into the search box to bring up the Plugin: WP User Frontend
The plugin will look like this below:
After downloading the plugin and installing it on your blog, follow the installation instructions given below to activate the pro version fully.
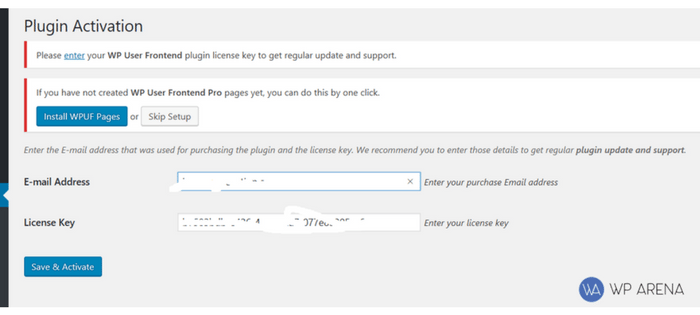
Make sure the installation process is successful, activate it by clicking the link in the header as shown in the image below.
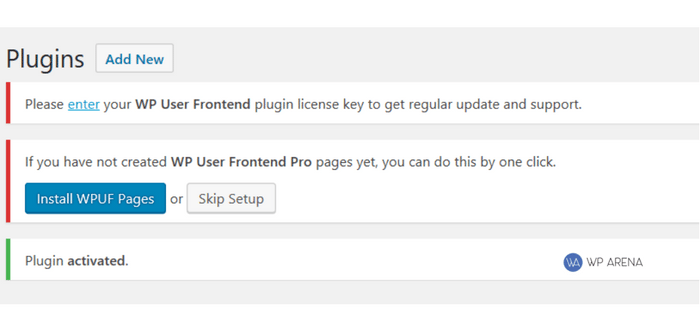
After you fill in your purchased email address and activation code, click on "Save & Activate". You should end up on this page below.
Let's go ahead and click on the install WPUF pages button to complete the initial plugin installation process. You should now be on this page and ready to dive into the plugin's features.
How To Configure WP User Front End
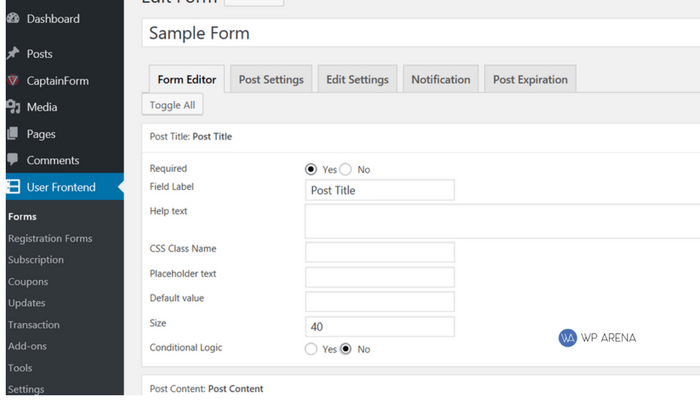
I am going to walk you through the process of what I would select to create this form for authors to submit blog posts to a test blog of mine.

Hold on; there are more settings on this page I want to show you.

Save settings and let's move to the next section.
Dashboard
These are the necessary settings and choose what you prefer. I'll mention why I selected the following on this image:

When a person submits a blog post, you want them to have the final version perfect, afterward, you review it, and if it meets your editorial Guidelines, you publish it. Do not allow them to edit their posts. This helps keep the submissions to be of excellent quality meaning you can approve them much quicker if you get a lot of requests. This is my opinion, but it's your blog, so you make the call on certain settings.
The last set of settings.

The reason I always use large images is that the user does not know the size dimensions that your theme uses for featured images, posts, and thumbnails. You can edit the sizes yourself or use a tool to do so. Save settings after this and proceed to the next tab.

Earlier when you finished activating and setting up the pages for this plugin, custom pages were automatically created in your "Pages" section of the WordPress dashboard. It will save your time by creating multiple important pages at once. Select registration for all user groups and save settings.
Let's go to the payments section. Yes, with the pro version you have full access to set up a fee for submitting a blog post. This will get the spammers not interested in submitting posts because they know their post is of not good quality. The people who pay a fee, you know they are serious about getting their guest post published on your blog and should expect a quality post to review. Let's get to show you the settings available. You can still make it free to submit a blog post. It's up to you.

The rest of the settings are self-explanatory. That's it; this is the initial setup of the plugin then you can create a page for users to submit content like I just did.
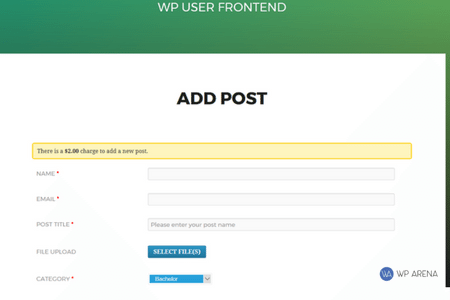
Above is an example of creating a form. Here is what I created fast.
Keep in mind; I created a default form without using every feature the pro version offers.
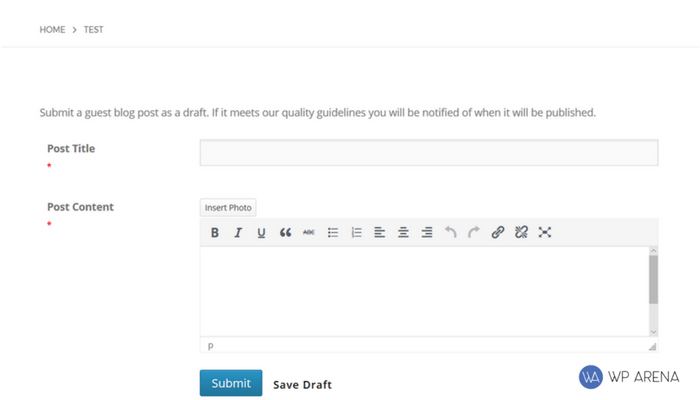
When you create a form, on the posting page, you will see a shortcode button in the editor to use that form. This is what I did to create that test form above.
Set the new page and follow the instruction below for configuring it.
- At first, you have to create a new page (new Post), then insert the shortcode [wpuf_form id="16868"]. In the case of the custom post insert this one [wpuf_form id="16868" post_type="event"].
- Secondly, create another new page named “Edit” for editing the posts and insert the shortcode [wpuf_edit].
- Create another new page called “Profile”, it is for editing profiles and adds the shortcode [wpuf_edit profile ].
- Create another new page called “Dashboard”, it is for listing custom post-type event and insert [wpuf_dashboard post_type="event"]
- There is a need to set the Edit Page option by going to the others tab on the settings page
- Add the shortcode [wpuf_sub_info], this will let the subscription info appear.
- Insert the shortcode [wpuf_sub_pack], this will make the subscription packs appear.
- Setting the payment Page by going to the Payments tab on the settings page will let you have the faultless subscription payment page.
Plugin Support
You can have two options for getting support from the devs of Plugin:
You’ll also want to take a look at the add-ons and Subscription sections in the sidebar menu, to further configure the plugin to fit your needs. The add-ons can take your blog much further. Since I have a MailChimp account, I would certainly get that add-on.
Haven't read enough? Check out the video below for a more video preview.


Responses (3 )