The AtContent plugin helps content owners to reach new audiences, provides backlinks for their posts and gains content control across the Internet. With this plugin, professionals are able to prevent plagiarism, monetize reposts and sell their work: articles, books, magazines, files.
AtContent Plugin Review

AtContent brands your post with your name by wrapping it in a special widget allowing to read and repost publications for free or for a fee.
The plugin can be found in a free version, available on WordPress.
Why install?
- Your content gets branded with your name. With reposts and plagiarism prevention you always get credit for your work.
- You gain full control over your content with the opportunity to block unwanted copies.
- AtContent plugin increases your site’s search ranking by getting free backlinks for every publication.
- AtContent helps you to increase your readership by getting the new audience on other sites.
- Content monetization has never been so easy and diverse!
Step 1: Installation and connection
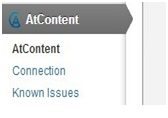
When you download the plugin, AtContent can be installed like any other plugin. After the installation, in the left side of the dashboard, the AtContent Menu appears.
The menu contains the following options:
- AtContent – here you can brand your posts and get as many backlinks as many posts you have. Additional features – plagiarism prevention, reposts monetization, comments and notifications also available here.
- Connection – on this tab you can connect your blog to AtContent and use all its advantages.
- Known Issues – here you can turn off AtContent processing for specific pages and customize AtContent integration with other plugins.
Connection to AtContent platform
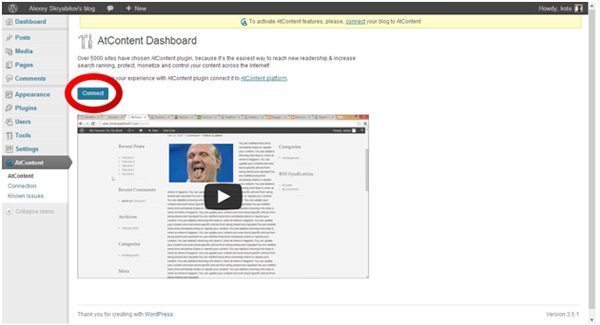
The AtContent plugin provides all its functions only when it is connected to AtContent platform. To connect the plugin you need to click the “Connect” button from AtContent or Connection tabs.
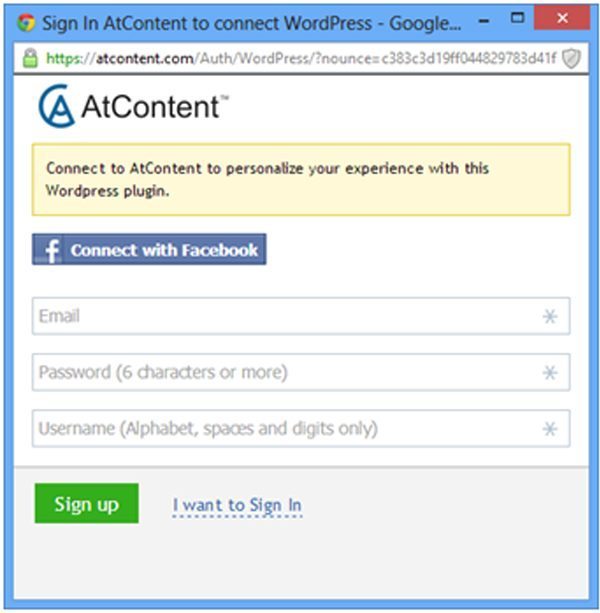
If you do not have an AtContent account you will be asked to create one. Connect with Facebook or fill in the fields:
Once the plugin is activated and connected, tabyouyou get the ability to control your content all over across the Internet, not just on your blog.
Step 2: Settings
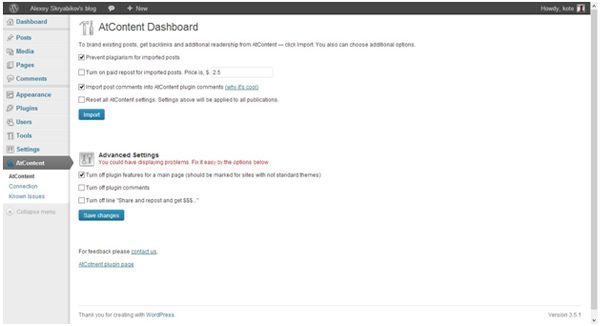
On the AtContent tab, you can brand your posts and get backlinks by clicking “Import”.
Additional options:
- Prevent plagiarism for all posts – disable usual browser tools to copy and paste text, e.g. Ctrl+C and context menu.
- Turn on paid repost for all posts – charge your readers for reposting any your publication. Mainly, this option is for people who have lots of quality content and don’t want to give it away for free.
- Import post comments into AtContent plugin comments – this turns all comments you already have to AtContent comments. AtContent comments are visible and can be answered on any website where the publication was reposted.
- Reset all AtContent settings– brings all settings to default.
Advanced settings:
- Turn off plugin features for a main page – this turns off widget wrapping for main page posts. This is done because widgets may have improper display in non-standard WordPress themes. When you have all your posts imported or have created the first post after plugin installation, uncheck this checkbox and look at the main page of your blog. If it looks ok, leave it, if it is not, check it again.
- Turn off plugin comments – if you do not want AtContent plugin comments, turn it off here.
- Turn off “Share and repost and get $$$” line – to turn off the invitation to share your paid posts check this checkbox.
Importing
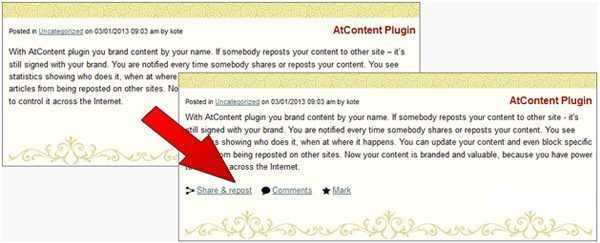
For instant content branding, cloud backup and backlinks it’s needed to import your blog posts to AtContent. For this you only need to click the “Import” button on a plugin settings page and wait a few minutes. After the process is done every your post must get the following panel at the bottom:
If it did not appear, go to the settings and uncheck the “Turn off plugin features for a main page” option.
Step 3: Creating paid and paid repost publications
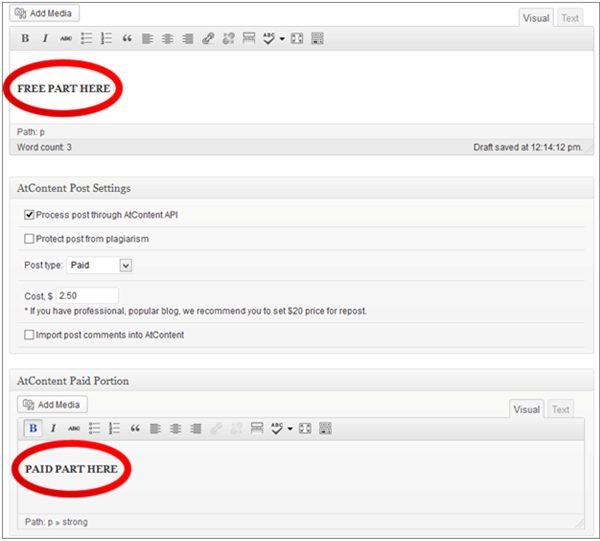
AtContent plugin tweaks the publication process and adds the opportunity to charge your readers for reading or reposting your posts. Look at the AtContent Post Settings Panel at the bottom of the usual post editor:

- Process post through AtContent API – if this option is turned off you will disable AtContent plugin for this post.
- Protect post from plagiarism – disable usual browser tools to copy and paste text, e.g. Ctrl+C and context menu.
- Post type – Free/Donate/Paid/Paid Repost.
- Import post comments into AtContent – import WordPress comments to AtContent for interaction with reposters and their readers.
If you select “Paid” type of publication, the second text field will appear on the post creation screen. The upper field if for the free part of your post. Here you should add a brief description that attracts readers to buy the full version. The lower text field is for the paid part, which cannot be seen unless a reader pays the needed amount of money.
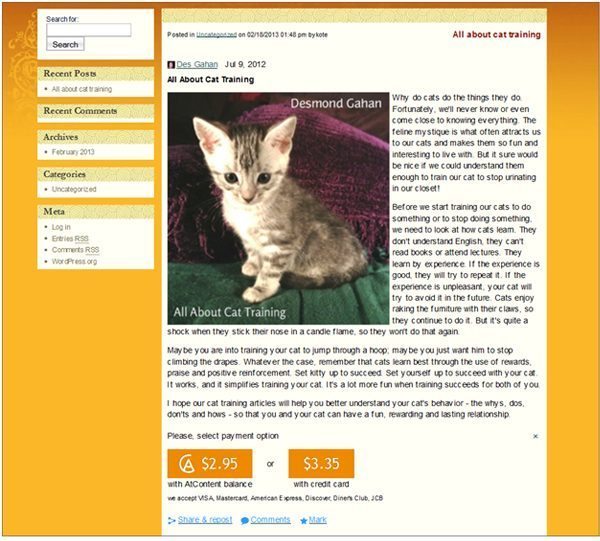
A paid publication with expanded purchase panel is displayed below:
Donatable and paid repost publications can be created in the same way, except you select other publication type.
Support
For AtContent you can receive support on the official support forum. You are also welcome to send your emails to mail@atcontent.com or fill in a support form.
White Label Branding for WordPress

Are you a WordPress developer or a Web Designer who uses WordPress to develop websites for your clients? Have you ever wished that it was easier to customize the menu’s and logo’s in WordPress and to decide which menu’s the users have access to? With White Label Branding for WordPress you can do exactly this. Take full control over the branding in wp-admin and decide who has access to what features. With the latest version of White Label Branding you have the ultimate tool for customizing WordPress admin and your login screen.
Automatic IceCat product information

Icecat is an open catalog, wich means that all of the data is open to everyone!
- Icecat offers data of 5938 brands
- It has a total of 1521587 datasheetsavailable
- Click here for a full list of free brands
And best of all, most of them are free!
WP Boxer Pro

A WordPress plugin that will assist in creating beautiful content boxes by using 1 simple shortcode. Each of these boxes can contain a header, an image, some content and an optional link which can point to any given location. Boxes can be added to any section in your WordPress theme that supports shortcodes, so basically anywhere.
LinkShare eStore Affiliates Plugin

LinkShare eStore Affiliates is a plugin that allows you to create a store featuring products from a wide variety of merchants, worldwide stores and more, in just minutes.
With the LinkShare Affiliates program you are given access to a wide variety of merchants and products, including Apple iTunes, Wallmart, Dell and many others. If you want to offer brand recognition and popular products on your website, Linkshare is a great choice.
White Label Branding for WordPress Multisite
Are you running a WordPress Multisite Network? Are you a WordPress developer or a Web Designer who uses WordPress to develop websites for your clients? Have you ever wished that it was easier to customize the menu’s and logo’s on each sub-site in your WordPress Multisite Network? Would you like to give each sub-site the ability to do their own branding? Look no further! This plugin let you control the branding of the main site and all sub-sites in a network of websites powered by WordPress Multisite.
Security Ninja
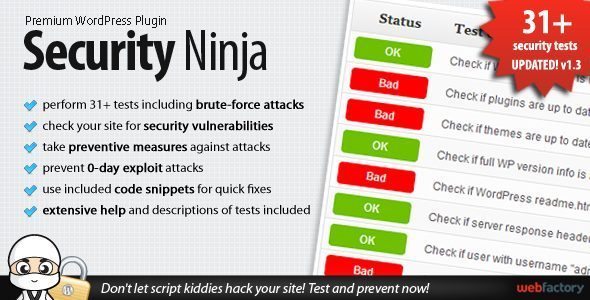
Security Ninja contains 19 separate security tests. Once you click the “Run Tests” button all tests will be run. Depending on various parameters of your site this can take from ten seconds to 2-3 minutes. Please don’t reload the page until testing is done.


