


Imagine walking into a library where books are scattered everywhere with no rhyme or reason. Frustrating, right? The same goes for your website. The structure and format of your site are important factors in delivering a seamless User Experience (UX).
But as you keep adding more content, maintaining order can feel like trying to herd cats.
Thankfully, a Content Management System (CMS) can be your best friend in this chaos. A CMS helps you keep everything tidy, by organizing your content into categories and subcategories. This is especially handy for WordPress users, where you can easily sort your posts and keep them in check.
We'll discuss categories and sub-categories and how they relate to web content. Then, we'll guide you through setting them up in WordPress with just three simple steps. Ready to transform your site into a well-organized haven?
Let's get started!
Add Categories & Subcategories in WordPress
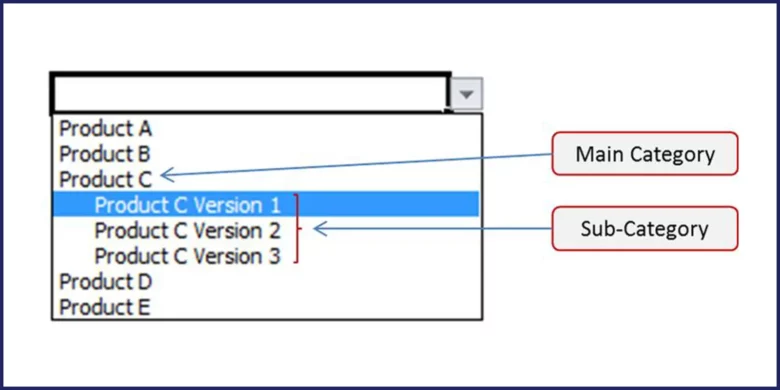
Categories are like digital folders that help you sort your posts into different topics. They make it easier for readers to find what they want. For example, a blog about digital marketing might have categories like SEO, Content Marketing, Social Media, and Email Campaigns.
Subcategories are like smaller folders inside the main categories. They give you a more detailed way to organize your content. For instance, you could have subcategories like "On-Page SEO" and "Off-Page SEO" under the main category of "SEO". This helps create a clear and logical structure.
Categories and subcategories make your site easier to explore, improve how your content is structured, and give your SEO a boost. They help visitors quickly find what they need, keep your content manageable, and make your site more user-friendly. Plus, a well-organized site keeps readers engaged and encourages them to stick around longer.
Planning Your Content Structure
Organizing your website’s content doesn’t have to be overwhelming. With a little planning, you can create a structure that makes sense for both you and your visitors. Here’s how to get started:
Content Analysis
First things first, take a good look at what you’ve already got. Review your existing posts and pages to see what topics you’ve covered. This helps you spot patterns and understand what your audience is interested in. Here are a few steps to get you started:
- What topics do I write about most often?
- Are there common themes or patterns in my content?
- How can I group similar posts?
For example, if you run a travel blog, you might notice posts about destinations, travel tips, and packing guides. These could naturally become your main categories.
Creating a Logical Hierarchy
Once you’ve identified your main topics, it’s time to organize them into a clear, easy-to-follow structure. Here’s how:
- Start with broad main categories (e.g., "Destinations," "Travel Tips").
- Break them down into more specific subcategories (e.g., "Europe," "Packing Hacks").
- Keep it simple and intuitive—think about how your audience would search for information.
This approach not only helps visitors find what they need quickly but also makes your content easier to manage.
Best Practices for Naming Categories
The names you choose for your categories are important—they should be clear, descriptive, and user-friendly. Here are some tips:
- Use straightforward language (e.g., "Budget Travel" instead of "Thrifty Wanderlust").
- Avoid slang or overly creative names that might confuse readers.
- Include relevant keywords for SEO, but keep it natural.
For example, if you’re writing about fitness, a category named "Home Workouts" is far more effective than "Sweat Sessions."
Also Read: How To Create WordPress Child Theme? Common Mistakes To Avoid, and Advance Customizations
Implementing Categories in WordPress
Once your structure is planned, adding categories in WordPress is simple:
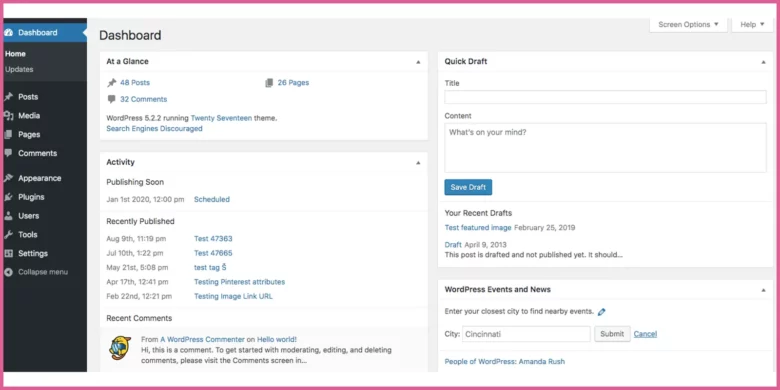
1. Go to your dashboard and click on Posts > Categories.
2. Create your main categories (e.g., "Recipes," "Travel Tips").
3. Add subcategories under each main category (e.g., "Desserts," "Europe").
4. Assign each post to the appropriate category.
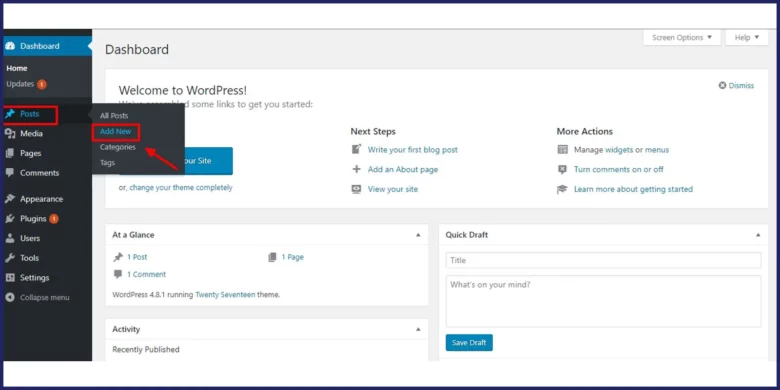
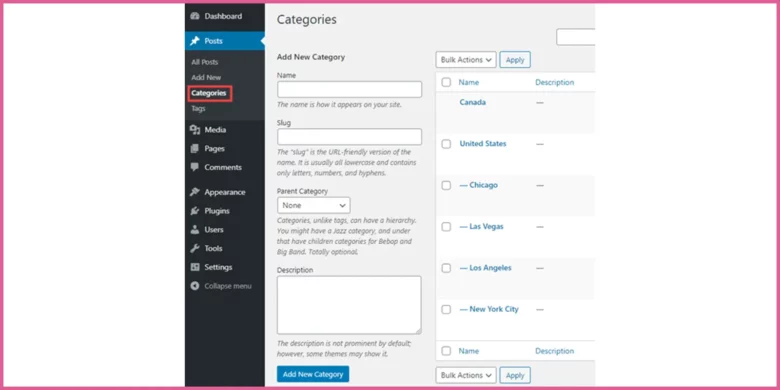
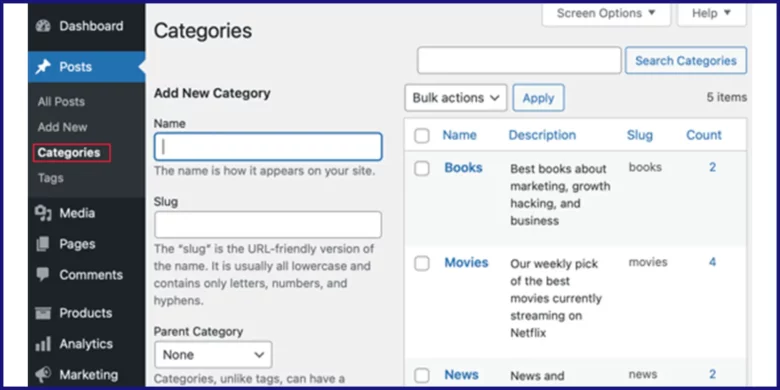
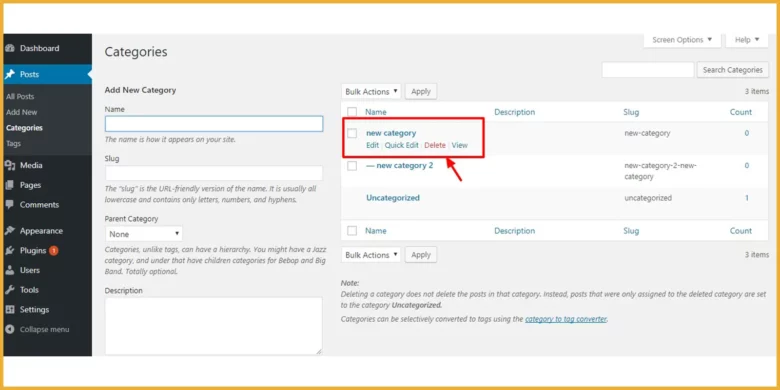
Accessing the Categories Section in WordPress
Navigating the Dashboard
Finding the Categories section in WordPress is straightforward. Here’s how to do it:
1. Log in to your WordPress dashboard.
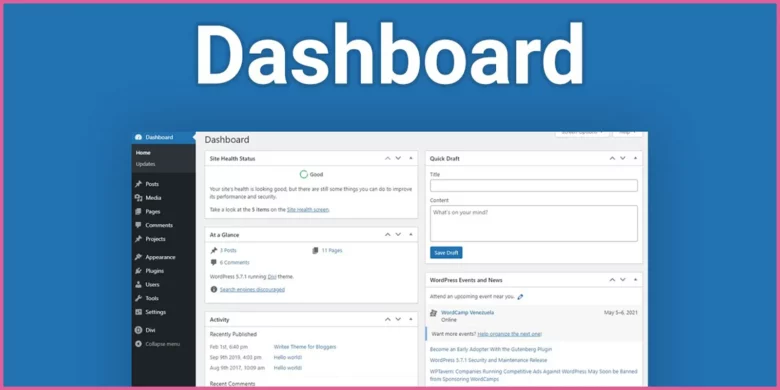
2. On the left-hand menu, hover over Posts.
3. Click on Categories from the dropdown menu.
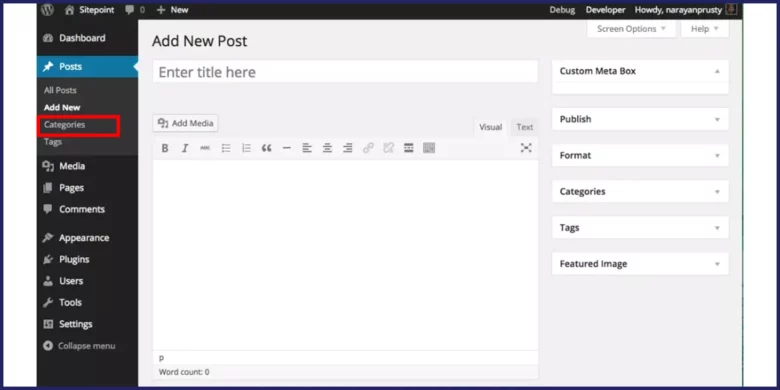
That’s it! You’re now in the Categories section, where you can create, edit, and manage your categories.
Overview of the Categories Screen
Once you’re in the Categories section, you’ll see a simple yet powerful interface with a few key options:
- Name: This is where you enter the name of your category (e.g., "Travel Tips").
- Slug: The slug is the URL-friendly version of your category name (e.g., "travel-tips"). It’s auto-generated but can be customized.
- Description: Add a brief description of the category. While this isn’t always visible, it can be useful for organization and some themes may display it.
- Parent Category: If you’re creating a subcategory, use this dropdown to assign it to a main category (e.g., "Europe" under "Destinations").
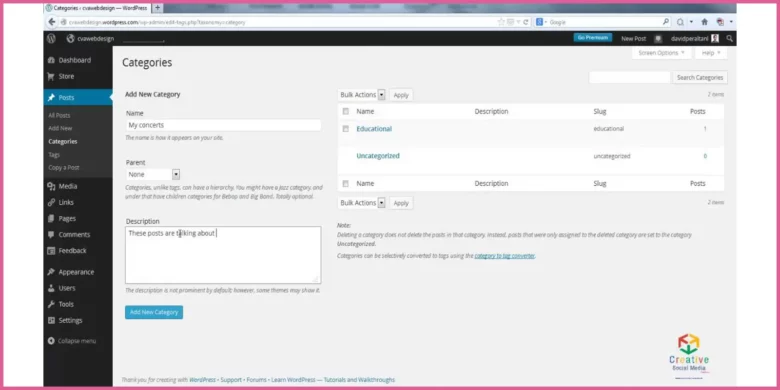
How to Create Categories in WordPress
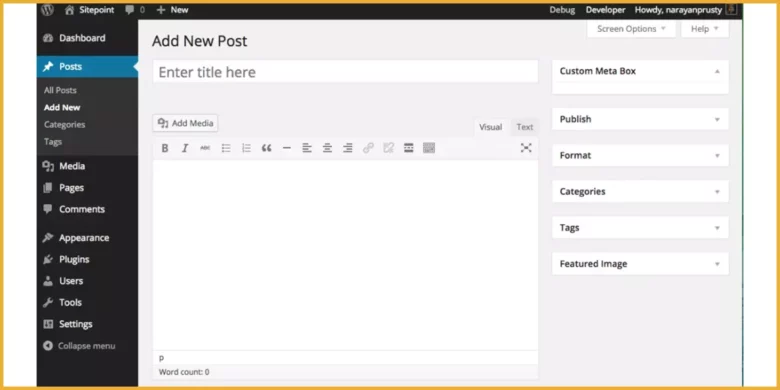
If you’re in the middle of writing a post and realize you need a new category, WordPress makes it easy to add one without leaving the editor. Here’s how:
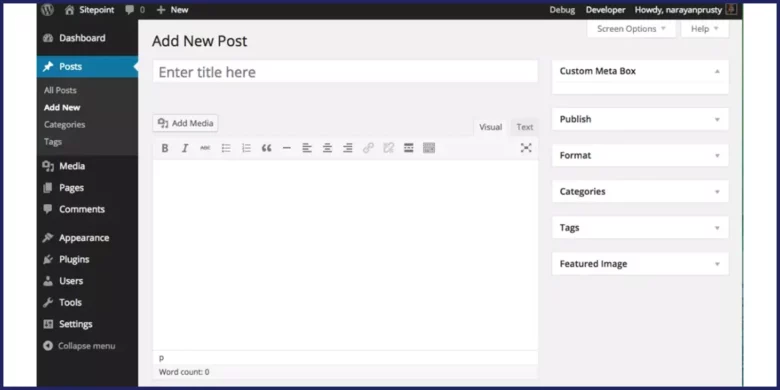
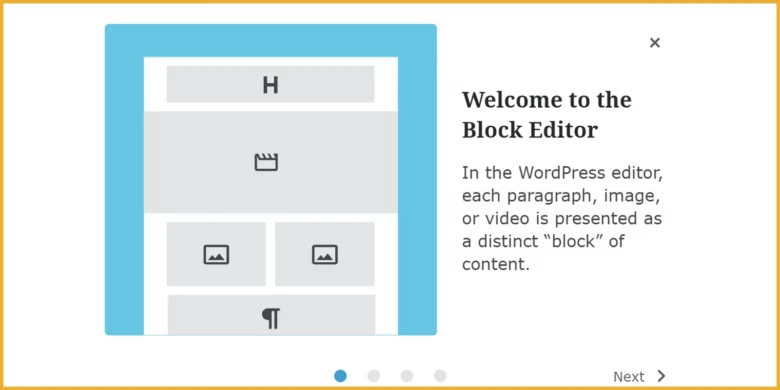
Open the Post Editor
- Go to the post you’re working on in the Block Editor.
- Click on the gear icon (⚙️) at the top-right corner to open the settings menu.
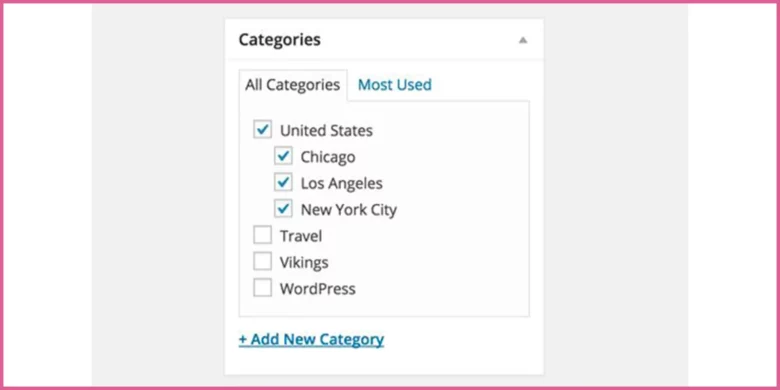
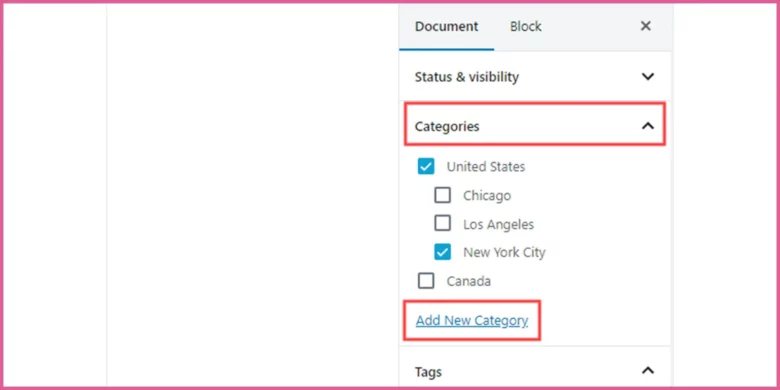
Expand the Categories Section
- Scroll down to the Categories section in the settings menu and expand it.
- You’ll see a list of existing categories. If you haven’t created any yet, the only option will be "Uncategorized," which WordPress adds by default.
Add a New Category
- Click on the Add New Category link below the list.
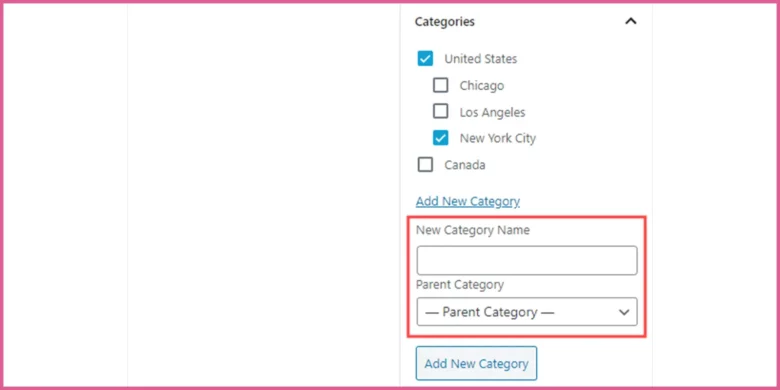
- A new set of fields will appear:
- New Category Name: Write a unique name for your category (e.g., "Exercise").
- Parent Category: Select a parent category from the dropdown menu if this is a subcategory. For now, leave this blank if you’re creating a main category.
Save the Category
Click the Add New Category button.
That’s it! Your new category is now created and ready to use. You can assign it to the current post or any future posts.
For example, if you’re running a health and fitness blog, you might create a main category like "Exercise" and later add subcategories like "Cardio" or "Strength Training."
Pro Tip: Don’t overdo it—create categories that are broad enough to cover multiple posts but specific enough to be meaningful to your readers.
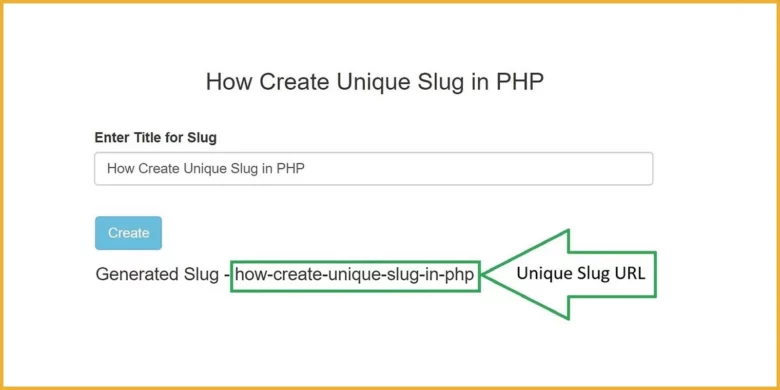
Tips for Creating SEO-Friendly Slugs
Creating SEO-friendly slugs is one of those small yet impactful steps that can make a big difference for your website. A well-optimized slug not only helps search engines understand your content better but also makes your URLs cleaner and more appealing to users.
Think of it as the address to your content—it should be clear, concise, and easy to remember. You can create slugs that boost your SEO by following a few simple guidelines while improving the overall user experience.
Here are a few tips to write an SEO-optimized slug:
- Use lowercase letters to avoid confusion, as slugs are case-sensitive.
- Separate words with hyphens (-) instead of spaces or underscores for better readability.
- Include relevant keywords to signal the page’s topic to search engines.
- Keep it short and sweet, aiming for 3-5 words to improve readability.
- Avoid stop words like "the," "and," or "a" that don’t add value.
- Note that the slug accurately reflects the content of the page.
- Skip special characters like %, &, or @ to keep the URL clean and functional.
- Focus on user intent, it is something your audience can easily understand and remember.
- Avoid adding dates to prevent the slug from becoming outdated over time.
Example of a Good Slug:
Instead of: "The-Best-Recipes-For-A-Vegetarian-Diet-2023"
Use: "best-recipes-vegetarian-diet"
Writing Effective Descriptions
Creating descriptions that work for both users and search engines is an art. It’s about finding the sweet spot between being informative, engaging, and optimized for SEO.
A great description not only tells users what your page is about but also provokes them to click through. At the same time, it needs to include relevant keywords naturally to help search engines understand and rank your content.
The goal is to create a concise, compelling summary that accurately reflects your page while making it irresistible to click on.
Here are some key points to keep in mind:
Use Relevant Keywords
Include important keywords related to your page’s topic, but avoid overloading the description with them. Focus on natural language that flows well.
Keep it Concise
Write under 150-160 characters. Search engines often cut off longer descriptions and readers see only a few words in the SERP, so make every word count.
Be Informative
Clearly explain what the page is about and what users can expect to find. Think of it as a mini-preview of your content.
Engage the Reader
Use active voice and compelling language to grab attention and encourage clicks. For example, instead of "This page has summer dresses," try "Discover stylish summer dresses for every occasion."
Create Unique Descriptions
Each page should have a specific description that accurately represents its content. Avoid using the same generic text across multiple pages.
Example of a good description
“Explore our latest collection of trendy summer dresses for women. From casual daywear to elegant evening styles, find affordable, fashionable outfits.”
What to avoid
- Generic descriptions that don’t stand out or provide specific value.
- Keyword stuffing can make your description sound unnatural and hurt your rankings.
- Misleading information that doesn’t match the actual content of the page.
How to implement
- Use meta description tags in your content management system (like WordPress) to add descriptions for each page. These are what show up in search results.
- Expert SEO tools like Google Search Console or third-party platforms to track your click-through rates and refine your descriptions for better performance.
Creating Subcategories
Subcategories, also known as child categories, are a way to organize your content into a more detailed and hierarchical structure. Take them as smaller, more specific groups nested under broader main categories (parent categories).
For example, if you have a main category called "Recipes," you might create subcategories like "Desserts," "Healthy Meals," or "Quick Dinners" to break it down further.
This parent-child relationship helps create a logical flow for your content, making it easier for visitors to find exactly what they’re looking for on your website.
It provides search engines with a clear understanding of your content's organization, which dramatically improves your website’s SEO. You can improve both user experience and content discoverability by using subcategories effectively.
Key Points to Remember
- Subcategories are nested under main (parent) categories.
- They allow you to organize content into more specific topics.
- This hierarchy improves site navigation and SEO.
- Always keep in mind that subcategories are relevant to their parent category.
For instance:
Parent Category: Travel
Subcategories: Europe, Asia, Budget Travel
Step-by-Step Guide to Adding a Subcategory
Creating subcategories in WordPress is a straightforward process that helps you organize your content into a clear, logical structure. Whether you’re running a blog, an online store, or a portfolio, subcategories make it easier for visitors to find what they’re looking for.
The process is similar to adding regular categories, but with one extra step: assigning a parent category. Here’s how to do it step by step:
Start Editing a Post & Select the Categories Tab
- Open the post you want to assign to a subcategory.
- Click the gear icon (⚙️) in the Block Editor to open the settings menu.
- Open the Categories section to see your existing categories.
Click on the Add New Category Link
- Click Add New Category.
- Write the name of your new subcategory (e.g., "Beginner Yoga").
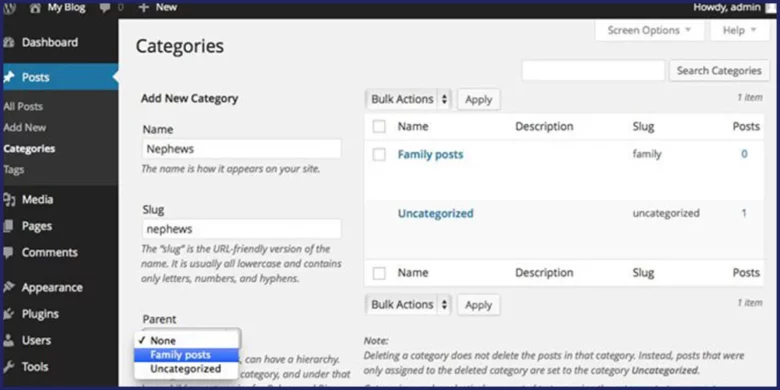
Select a Parent Category
- Use the Parent Category dropdown menu to assign the subcategory to a main category (e.g., "Exercise").

- Click Add New Category to save it.
Once created, you can assign the subcategory to your post or manage it further by going to Posts > Categories in your WordPress dashboard. This simple process keeps your content organized and user-friendly!
Organizing Content Within Subcategories
Once you’ve created subcategories, the next step is to organize your content effectively to maintain clarity and relevance. A well-structured website not only improves user experience but also boosts SEO by making it easier for search engines to crawl and index your content.
Here are some practical tips to help you keep your subcategories tidy and meaningful:
Stick to a Logical Hierarchy
Each subcategory should be directly related to its parent category. For example, under "Travel," subcategories like "Europe" or "Budget Travel" make sense, while "Recipes" would not.
Avoid Overloading Subcategories
Don’t create too many subcategories. If you end up with dozens, it might mean your main categories are too broad or your subcategories are too specific.
Use Descriptive Names
Choose clear, specific names for your subcategories that accurately show the content they contain. For example, "Quick Vegan Meals" is better than just "Vegan."
Assign Posts Correctly
Always allot posts to the most relevant subcategory. If a post fits into multiple subcategories, choose the one that best represents its primary focus.
Regularly Review and Update
Periodically review your subcategories so that they’re still relevant. Merge or delete subcategories that are no longer useful, and update posts as needed.
Balance Content Distribution
Look for an even distribution of posts across subcategories. If one subcategory has significantly more posts than others, dilute it further.
Optimize for SEO
Use keywords naturally in subcategory names and descriptions. This helps search engines understand your content better and improves visibility.
Test User Experience
Ask for feedback from users or test your website thoroughly to make sure subcategories are structured and easy to use.
Example:
Parent Category: Fitness
Subcategories: Yoga, Cardio, Strength Training
Posts: Write "Beginner Yoga Tips" to the "Yoga" subcategory, not "Cardio."
Also Read: Top Premium WordPress Plugins and Themes
Managing and Editing Categories
Keeping your categories and subcategories up-to-date is just as important as creating them. Over time, you might need to edit names, rewrite posts, or remove categories that are no longer relevant.
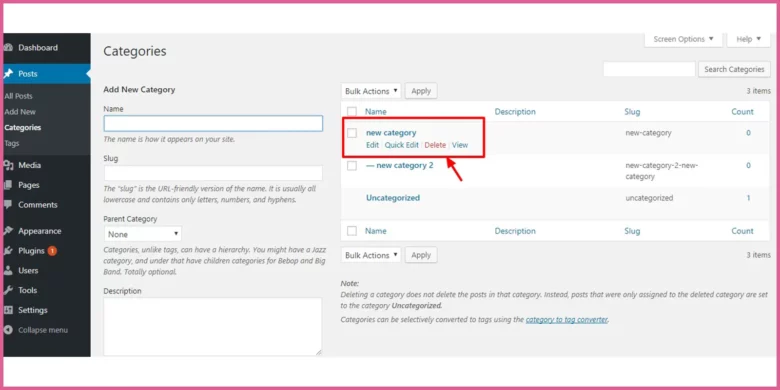
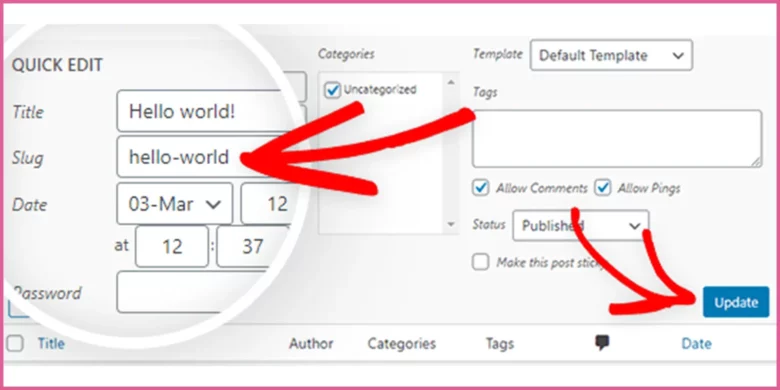
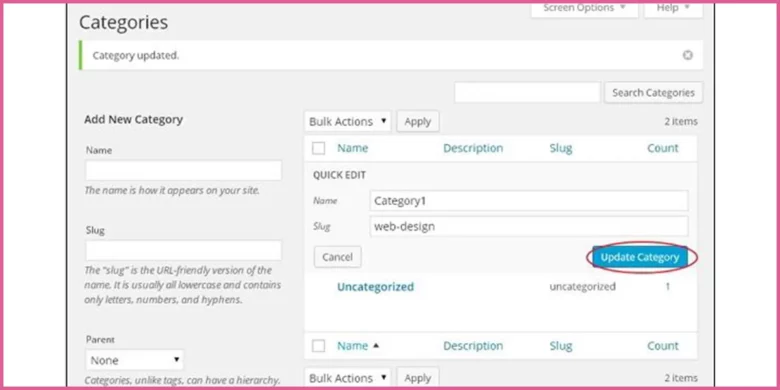
Editing Existing Categories
If you need to update a category’s name, slug, or description, follow these steps:
1. Go to Posts > Categories in your WordPress dashboard.

2. Hover over the category you want to edit and click Edit.

Tips
Reassigning Posts to Different Categories
Sometimes, you’ll need to move posts from one category to another. Here’s how to do it:


Guidelines
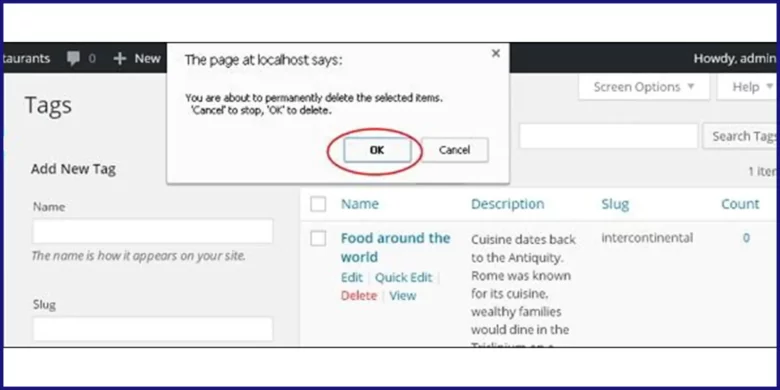
Deleting Unnecessary Categories
If a category is no longer useful, you can delete it. Here’s how:
3. If the category contains posts, WordPress will prompt you to reallocate them to another category. Choose a new category for those posts.
Best Practices
Integrating Categories with Your WordPress Theme
Categories integration is yet a bit hectic task but it is very important to manage categories and subcategories to build a structure of your blogpost compatible with your WordPress theme.
Displaying Categories on Your Website
You can display them in various parts of your website, to make your categories easily accessible to visitors. Here are some points to follow:
Menus
Add categories to your main navigation menu. This makes it easy for visitors to find content. Go to Appearance > Menus in your WordPress dashboard, create a new menu, and add your categories as menu items.
Widgets
Use the Categories widget to display your categories in a sidebar or footer. Go to Appearance > Widgets and drag the Categories widget to your desired area.
Sidebars
Many themes come with built-in sidebars where you can list your categories. This is a great way to keep your content organized and easy to read.
Customizing Category Pages
The user experience of your website can be increased by customizing your categories on your category pages and it can make a big difference. Here’s how you can do it:
Custom Templates:
Create custom templates for your category pages to give them a unique look and feel. This can include custom headers, footers, and layouts. You can do this by creating a new PHP file in your theme directory and naming it something like category-your-category-slug.php.
Featured Images
Excerpts
Display excerpts of posts on category pages instead of full posts. This keeps the page clean and easy to reach.
Plugins for Enhanced Category Management
Plugins can help you manage categories and subcategories more effectively. Here are a few popular ones:
Category Order and Taxonomy Terms Order
This plugin helps you to manually order your categories and subcategories. It’s great for keeping your content organized in a way that makes sense to your readers.
WP Category Meta
This plugin adds custom fields to your categories, allowing you to add extra information like descriptions or images.
Yoast SEO
Yoast SEO as a primary SEO plugin also helps with category management by providing value and suggestions for optimizing your categories and subcategories.
Troubleshooting Common Issues
You might run into a few hiccups when working with categories and subcategories in WordPress even with careful planning.
Don’t worry…!!! Most issues have a short and proper solution.
Here’s how to tackle some of the most common problems:
Categories Not Appearing as Expected
If your categories or subcategories aren’t showing up where they should, there are a few possible reasons:
Theme Limitations
Some themes don’t display categories prominently. Check your theme settings or consider switching to a more flexible theme.
Widget or Menu Issues
If you’re using a category widget or menu, check whether it’s properly configured. Go to Appearance > Widgets or Appearance > Menus to double-check.
Problems
You need to clear your website’s cache if you’re using a caching plugin. Sometimes, outdated cache files can cause display issues.
Fixes
- Verify that categories are assigned to posts.
- Check your theme’s documentation for category display options.
- Clear your cache and refresh the page.
Conflicts with Themes or Plugins
Conflicts between themes, plugins, and WordPress core features can sometimes disrupt how categories work.
For example, a plugin might override default category settings, or a theme might not support custom category layouts.
How to Identify and Resolve Conflicts
- Disable Plugins
Temporarily deactivate plugins one by one to see if the issue resolves.
- Switch Themes
Test your website with a default theme like Twenty Twenty-Three to see if the problem persists.
- Check for Updates
Keep your theme, plugins, and WordPress core up to date.
Pro Tip: Always test changes on a staging site before applying them to your live site.
Managing SEO Issues Related to Categories
Categories can sometimes create SEO challenges, such as duplicate content or poorly optimized category pages.
Here’s how to avoid these issues:
Avoid Duplicate Content
Each category and subcategory should have a unique description. Avoid adding the same post to multiple categories unless necessary.
Optimize Category Pages
Add meta descriptions, titles, and keywords to your category pages. Use plugins like Yoast SEO or Rank Math to streamline this process.
Use Canonical Tags
If duplicate content is unavoidable, use canonical tags to tell search engines which version of the page to prioritize.
Tips for Optimization
- Write unique, engaging descriptions for each category.
- Use keywords naturally in category names and descriptions.
- Regularly audit your category pages for SEO performance.
Advanced Tips and Techniques
Advanced tips and techniques are there to save your time and effort and automate the process so that you can focus on other sections of your blog post in WordPress.
Automating Category Assignments
Automating category assignments can save you a lot of time and keep consistency. Here are a few ways to do it:
Plugins
There are several plugins available that can help automate category assignments. One popular option is the WP Auto Assign Category. This plugin helps you to set rules for automatically assigning categories based on keywords, tags, or other criteria.
Custom Code
You can use custom code snippets in your theme’s functions.php file or a custom plugin if you're comfortable with coding.
For example, you can use the wp_set_post_categories function to assign categories based on certain conditions.
Custom Taxonomies
Custom taxonomies are a powerful way to organize content beyond the standard categories and tags. Here’s how you can use them:
Creating Custom Taxonomies
You can create custom taxonomies through your theme’s functions.php file or a custom plugin. Use the register_taxonomy function to define your taxonomy and its properties.
Example: Let’s say you run a recipe blog and want to organize recipes by cuisine type. You can create a custom taxonomy called "Cuisine" with terms like "Italian," "Mexican," and "Chinese."
Using Custom Taxonomies
Once created, you can assign these taxonomies to your posts just like standard categories. This allows for more granular organization and can be particularly useful for complex content structures.
Improving Reach with Mega Menus
Mega menus are a great way to display complex category structures in an elegant and user-friendly manner. Here’s how you can implement them:
Plugins
There are several plugins available that can help you create mega menus. One popular option is the Max Mega Menu. It offers a visual interface to build mega menus and supports multiple columns, images, and more.
Custom Code
If you prefer a more customized approach, you can use custom code to create mega menus. This involves modifying your theme’s navigation menu code to include additional HTML and CSS for the mega menu structure.
Design Considerations
When designing your mega menu, keep usability in mind. Use clear headings, and logical groupings, and consider adding images or icons to make navigation more intuitive.
Conclusion
Organizing your WordPress site with categories and subcategories is more than just a technical task, it’s about creating a seamless experience for your visitors while boosting your site’s SEO. You make it easier for users to find what they’re looking for and for search engines to understand your site’s content by grouping it into clear, logical structures. Whether you’re managing a blog, an online store, or a portfolio, a well-organized category system can transform your site into a user-friendly hub that keeps readers engaged and coming back for more.
Ready to organize your WordPress site? Start by analyzing your content and creating a clear category structure today. If you have any questions or tips to share, drop a comment below. we’d love to hear from you!
Frequently Asked Questions (FAQs)
What is the difference between categories and tags?
Categories represent broad topic groupings for posts, while tags are more specific keywords that describe individual posts in greater detail.
How many levels of subcategories can I create in WordPress?
Technically, there is no set limit to how many levels of subcategories you can create in WordPress, meaning you can add as many sub-categories as you want within a parent category, creating multiple levels of nested subcategories; however, the WordPress admin interface may become difficult to manage with too many levels of nesting.
How do categories impact SEO?
Categories impact SEO by helping search engines better understand the structure and relationships between content on a website, allowing them to index pages more effectively and potentially improve the ranking of individual pages within a category, especially when category pages are well-optimized with relevant keywords and internal linking; essentially, categories provide context and organization for your content, which is beneficial for search engine crawlers.
Can I import/export categories from another site?
Yes, you can import and export categories from another website, typically using a plugin or built-in functionality on your content management system (CMS) like WordPress, which allows you to export your categories as a file (usually in XML format) and then import that file into another site, effectively transferring your category structure.
Will changing a category affect my existing posts?
No, simply changing a category on an existing post will not directly affect the content of the post itself; it only changes which category the post is listed under, allowing users to find it in a different section of your site, but the post itself remains unchanged.


Responses (1 )