

Let's face it, in the digital world, visual content is king. Whether you're a photographer, blogger, artist, or business owner, having a stunning gallery can make or break your website's user experience.
WordPress Gallery Plugins, being the powerhouse platform it is, offers numerous gallery plugins to help you create breathtaking image displays that'll make your visitors stop and stare.
Why Gallery Plugins Matter?
Before we dive into the best plugins, let's take a moment to understand the critical role visual presentation plays in modern web design. In an era of information overload, your images are more than mere decorations—they're powerful storytelling tools that communicate your brand's personality, quality, and unique value proposition.
A truly exceptional gallery plugin does far more than simply display images. It acts as a strategic asset that can:
- Transform casual visitors into engaged audience members
- Showcase your work or products in the most compelling light possible
- Provide seamless, intuitive navigation across different devices
- Protect your visual assets from unauthorized use
- Optimize website performance and loading speeds
By investing in the right gallery plugin, you're not just adding a feature to your website—you're creating a sophisticated visual communication platform that can significantly enhance user experience and drive meaningful engagement.
1. Modula - WordPress Intuitive Gallery Plugin
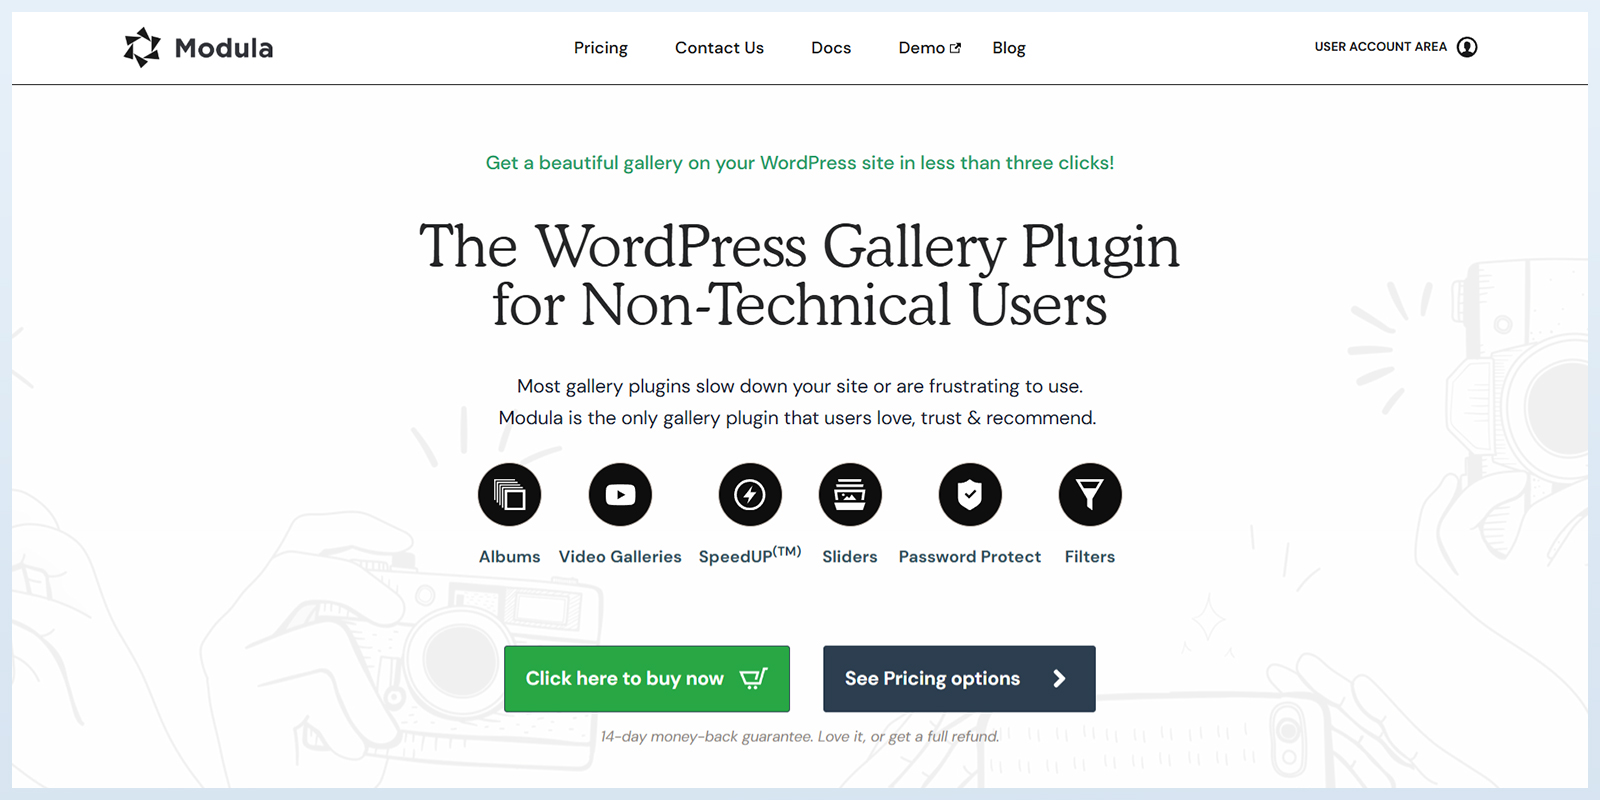
If you're looking for a plugin that's both powerful and incredibly intuitive, Modula is your go-to solution. What makes it stand out?
- Zero coding skills required
- Mobile-responsive design
- 42 unique image hover effects
- Lightbox gallery functionality
- Video extension capabilities
- Password protection and watermarking
- Easy album creation with filtering options
Pricing is flexible too, with a free version and paid plans starting at $39 for the Starter package. It's perfect for beginners and professionals alike who want a hassle-free gallery creation experience.
2. Imagely (formerly known as NextGEN Pro)

With over a million active users, Imagely has earned its reputation as a top-tier WordPress gallery plugin. It's particularly loved by photographers and visual professionals who need advanced features.
Key highlights includes:
- Responsive layouts
- Social sharing icons
- Support for YouTube & Vimeo videos
- Multi-gallery support
- eCommerce extension
- Automatic image backups and recovery
The plugin offers a free version with premium plans starting at $69.50 per year. If you're serious about your visual content, Imagely provides the tools you need.
3. Envira Gallery

It is dubbed as one of the top WordPress gallery plugins by many, Envira Gallery offers an impressive array of features designed for performance and user experience.
Stand-out features:
- Multiple gallery types (grid, masonry, justified, carousel)
- Drag-and-drop builder
- Lazy loading for improved page speeds
- Right-click protection
- Image watermarking
- SEO-friendly image descriptions
- Supports YouTube, Vimeo, and Wistia videos
- Pricing starts from $39.50
Envira makes it incredibly easy to create professional-looking galleries without technical expertise.
4. Soliloquy Slider
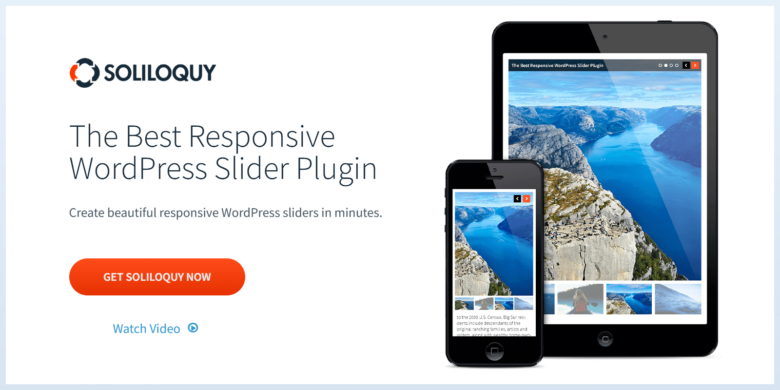
Soliloquy takes galleries to the next level by offering more than just static image displays. This plugin is perfect for those who want to create dynamic, engaging visual experiences.
Unique features include:
- Pre-built templates for quick customization
- Fullscreen lightbox mode
- WooCommerce integration for monetization
- Dynamic sliders from various sources (blog posts, Instagram, testimonials)
- Cool transition effects
- Social media integration
- Image download protection
Premium plans starting from $39, Soliloquy Slider is definitely the plugin you need to look out for!
5. WP Team

While it is not a traditional photo gallery plugin, WP Team is perfect for businesses wanting to showcase their team in a more interactive way. Here are some of the features that it offers:
- Multiple layout options (grid, slider, mosaic)
- Comprehensive team member profiles
- 300+ customization options
- Social media integration
- Pricing starts at $49 yearly
6. Divi Masonry Gallery
If you're using the Divi theme, then this premium plugin is a game-changer. It elevates your galleries with:
- Masonry-style layouts (1-10 columns)
- Gallery category filtering
- Customizable hover effects
- Lightbox and fullscreen viewing
- Seamless Divi theme builder integration
Priced at $25 per year, it's an excellent investment for Divi enthusiasts looking to create stunning visual displays.
Choosing the Right Gallery Plugin
Here are some important factors to consider when selecting a WordPress gallery plugin :
- Ease of Use: Look for intuitive interfaces
- Responsiveness: Ensure mobile-friendly designs
- Performance: Check image loading speeds
- Customization: Verify design flexibility
- Pricing: Balance features with your budget
- Support: Read user reviews and check support options
Pro Tips for Gallery Success
Here are a few things that will help your website if done properly, otherwise it might hurt the website instead:
- Always compress images before uploading
- Use consistent image sizes and styles
- Implement lazy loading for better performance
- Add descriptive alt text for SEO
- Regularly update your plugins
The Future of WordPress Gallery Plugins
As web technologies evolve, we're seeing gallery plugins become increasingly sophisticated. Emerging trends include:
- AI-powered image curation
- Advanced machine learning for automatic image optimization
- More granular control over image display and interaction
Enhanced integration with social media and marketing platforms
Final Thoughts
Your website's visual presentation can make or break user engagement. The right gallery plugin transforms ordinary images into compelling visual stories that capture and retain visitor attention.
Whether you're a photographer, blogger, business owner, or creative professional, there's a WordPress gallery plugin perfectly suited to your needs. From the user-friendly Modula to the professional-grade NextGEN Gallery, you have options to make your visual content shine.
Don't just display images – create experiences that leave a lasting impression.
Recommended Next Steps
- Identify your specific gallery needs
- Try free versions of top plugins
- Upgrade to premium features as your website grows
- Continuously experiment and optimize
Happy gallery building!


Responses (1 )