Seeing that the world has nearly 5 billion mobile users, this is high time to make websites and online content-adaptive with the small screen and processing power of our smartphones. For this reason, currently, an open-source project is in vogue – Google AMP.
AMP stands for Accelerated Mobile Pages. It is designed to help web content load faster and smoother on mobile phones. AMP uses minimum HTML coupled with only necessary Javascript to make a lightweight website that is easier to load.
All the AMP content will be hosted on Google AMP cache and delivered instantly when a user clicks on the corresponding search result. The format of these AMP pages is quite similar to Facebook Instant Articles that have been gaining popularity. All these pages are platform agnostic and support any app, browser or web viewer.
Now, regardless of what your views are on the matter, Google is going to give SEO preferences to websites that correspond to this new initiative. So you might as well learn how to set up AMP for your website!
Now if you are a WordPress user, you are in luck. Here we will be going through a guided overview on how to setup Google AMP in WordPress:
How to Setup Google AMP in WordPress
The advantage of using WordPress to create a blog or website is that there is pretty much a plugin for every situation. For this purpose, we would recommend the AMP plugin by Automattic.
Some notable aspect of the plugin includes Google Adsense integration, and AMP drag & drop page builder, option to make AMP content distinctively different from any standard mobile page, and much more. You can also set up Google Analytics, some social and SEO options, and so on.
Do note that only posts and not your pages will be AMP compatible with the use of this plugin. If you are wondering how to turn your web pages, then we will discuss that below.
Now let’s see how you can set up your first AMP using the plugin:
Installation:

First things First! We need to install the plugin. To do that, we have to go to the add new plugin section on the WordPress dashboard. Now simply search for AMP plugin. Once available simply click install and then active.
- Customization:

Upon activation of the plugin, head on over to the AMP options, which is located under the Appearance section in the WordPress Dashboard. Here you will get to see how your site looks. You will find options here that will let you control the header background, text color. It is also compatible with the site’s logo, provided your theme supports it. Once fully customized, click save.
- Setting up Google Analytics:

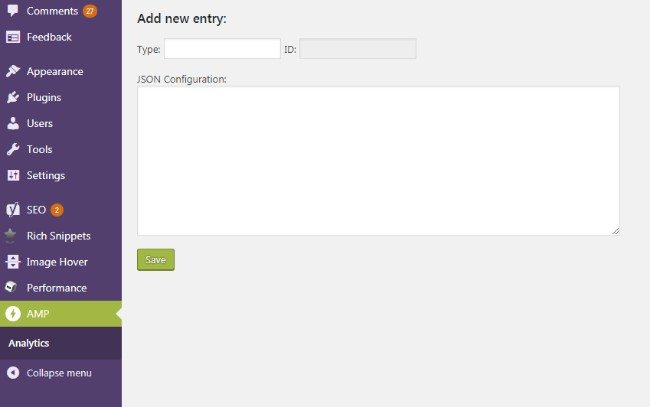
On the AMP page, you will find a section for Analytics. It is here you can set up your Google Analytics ID. just select the Analytics Type as Google Analytics and then enter your Google Analytics ID.
In case, you don’t know what your ID is; you can go to Google Analytics’ main page to find out. Simply log in, then go to Admin Panel > Account >Property > Tracking Info > Tracking Code, and there it is. To help you recognize it, always remember your ID starts with UA.
Problem while AMP
Sometimes your AMP post you might run into a 404 error. Don’t get too worried. Just visit the settings page where you will find the permalinks section.
Here all you need to do is simply click on the Save Change button to refresh the permalink structure, and you are good to go.
Glue for Yoast and AMP
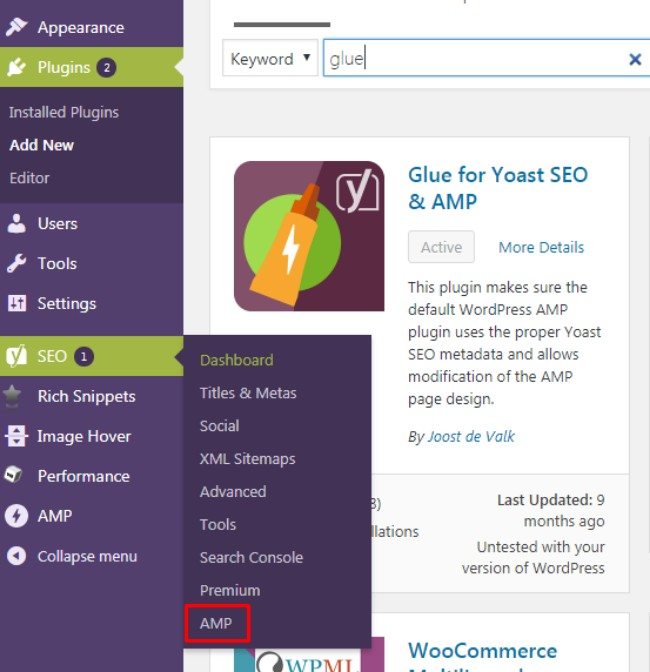
As you can see, customization options are rather limited here. Also, the AMP plugin doesn’t support turning your website pages into corresponding AMP pages. For this reason, we will be referring to Glue for Yoast and AMP.

Now, this plugin is an add-on for the popular Yoast SEO, so you will need to install and activate it if you want to take advantage of Glue. Once the addon is activated, you will find an AMP section under Yoast SEO.

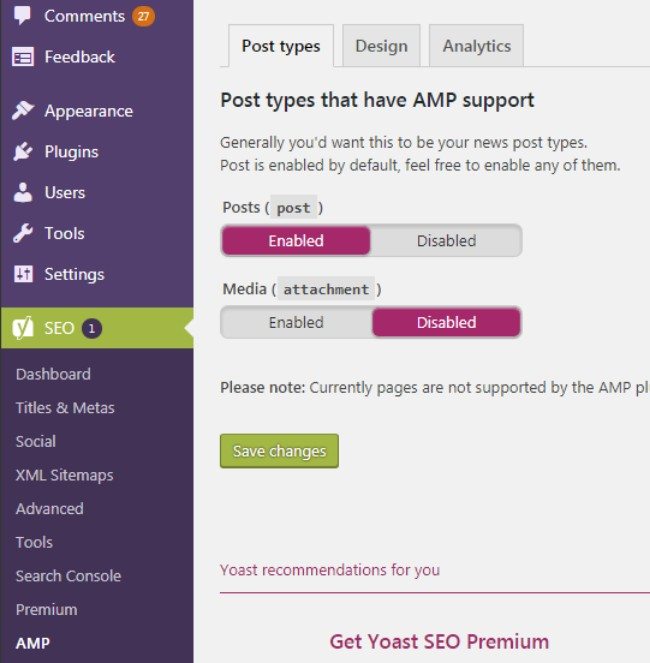
You will be greeted with three distinct sections here.

The first one would be Post Types. Here you will be able to select all the posts types you want to be AMP compliant.
Next is the Design tab. Here you can tweak around with some customization options which will help you change the look and feel of your AMP-enabled pages – yes pages! You will be able to apply CSS styling, customize the content, link colors, upload an AMP icon, select default images, and much more.
Up next is the Analytics section. But there is no need to bother about this one as we have already set up Google Analytics earlier.
Is your AMP-enabled Page or Post ready?
To answer the highlighted question, you can simply insert the AMP-enabled page or post’s URL in your browser’s address bar followed by ‘/amp’. However, a more accurate form of validation can be managed by doing an AMP test.
Simply go to this link: https://search.google.com/test/amp
Here you will be asked to drop your AMP-enabled page/post’s URL. Do this and click Run Test. It will show you whether or not your AMP page is running smoothly or not.
TroubleShooting
Sometimes, you will be visiting AMP page, you might encounter a 404 error. This can happen if your permalinks are not updated. To resolve this issue, simply head on over to the settings panel on your WordPress dashboard, go to the permalink, and click Save Changes. This will refresh the permalink structure and fix the problem.
AMP in Google Search Console
Through Google Search Console you will be able to check how your AMP pages are performing. Simply log into your Google Search Console Dashboard, and you will find the AMP section under the Search Appearance option. Here you will find all necessary data regarding your AMP webpages/posts.
Indexing
It is also here where you will get the option to index your AMP-enabled pages and posts. While inside the Google Search Console, simply select the ‘Submit to Google’ button to submit the URL.
Do note; Google will only index your AMP pages if it is linked to your XML sitemap or listed there.
In Conclusion:
There is still a wide range of mobile users who unfortunately don’t have access to high-speed internet. AMP pages will help them browse much content that was previously too irritating await. However, do note that you will not be given much freedom with how you structure your website, as many HTML and JavaScript are restricted to make sure AMP pages are as minimal and lightweight as possible.
Noting that you will get SEO benefits with AMP as well as support from many more platforms, we believe that setting up Google AMP for your WordPress website will be a wise decision.


Thanks, Editorial Staff
For this beautiful article with us.
Many WordPress bloggers don’t have an idea about AMP in details. Here, I have added some essential points are AMP working parts which are divided into three different parts :
How Does AMP Work?
Essentially a framework for creating mobile web pages, AMP consists of three essential parts:
AMP HTML: A subset of HTML, this markup language has some custom tags and properties and many restrictions. But if you are familiar with regular HTML, you should not have difficulty adapting existing pages to AMP HTML. For more details on how it differs from basic HTML, check out AMP Project’s list of required markup that your AMP HTML page “must” have.
AMP JS: A JavaScript framework for mobile pages. For the most part, it manages resource handling and asynchronous loading. It should be noted that third-party JavaScript is not permitted with AMP.
AMP CDN: An optional Content Delivery Network, it will take your AMP-enabled pages, cache them and automatically make some performance optimizations.