If you are in quest of a powerful pricing table plugin for your website that’s packed with brilliant features, your search ends here.
Repute InfoSystems brings to you a fantastic pricing table plugin that offers you with more than 300 pre-designed free sample templates for your tables. But that’s not the only thing you get. You also have access to a wide range of features that lets you create your tables with unique functions on them.
All you need to do is to pick the template of your choice and then simply customize it by using the intuitive drag-and-drop editor to make the changes.
This happens only if you are not happy with the 300+ template options that are waiting for your selection. Generally, all of these templates are good to go. But to give you more control over its looks and functionality you have the immense customization option that you will surely love using. This is something that you will not find in any other pricing plugin.
Now before I brag too much about the plugin, let’s have a quick look at its features.
ARPrice Features
To let you have the best experience with ARPrice, the developers took the opportunity of loading the plugin with brilliant features. Here’s a list of what it offers –
- Real-time Pricing Table Editor
- 300+ Pricing Table Templates
- Team Showcase
- Analytics
- Fully Featured Admin Panel
- External Script Integration
- Audio+Video Support (youtube, Vimeo, Dailymotion, Metacafe, SoundCloud, mixcloud, Beatport)
- HTML5 Audio+Video Support
- Monthly/Yearly Toggle Price Buttons
- Google Map Support
- Customizable Tooltip Support
- Unlimited colors of Tooltip Text and Background Color.
- Column Rotation with a lot of options
- CSS Based Ribbons
- Animated Pricing Table
- Responsive Pricing Table Designs
- Live Preview on desktop, tablet and mobile version
- Separate Settings for Header, Body, Pricing, and Buttons
- Unlimited Colors for All Header, Pricing, Body and Button Fonts
- Export/Import
- Browser Default + Google Fonts
- Custom Icons Support
- Robust Plugin Compatibility
- Unlimited Columns support
- WPML Ready
- Customizable Responsiveness
Installation and Settings
Like all other WordPress plugins, ARPrice WordPress Pricing Table is easy to install and set up. You just need to download the plugin and save it on your computer. You can then go to your dashboard and upload the downloaded folder by going to Plugins>Add New>Browse. Once done, click on the Activate button for the plugin to start working.
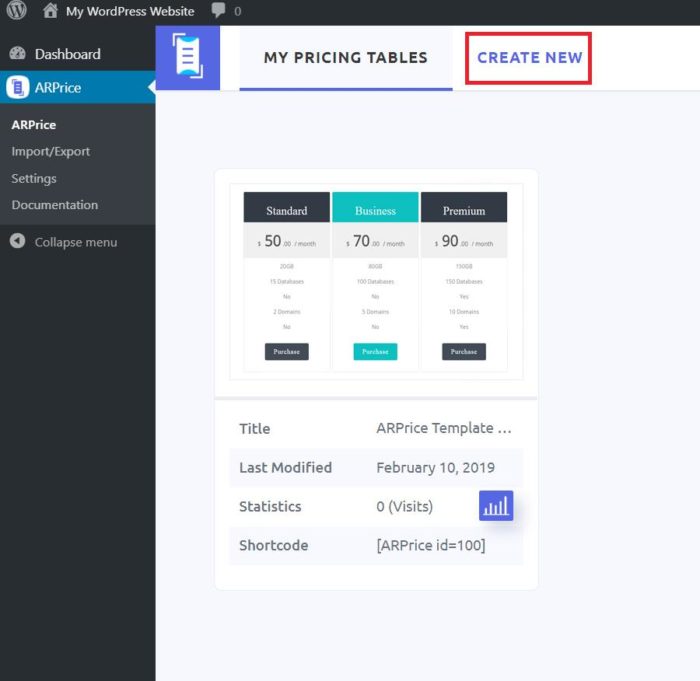
Now go to ARPrice to set up the plugin. Here’s how the plugin dashboard looks like.
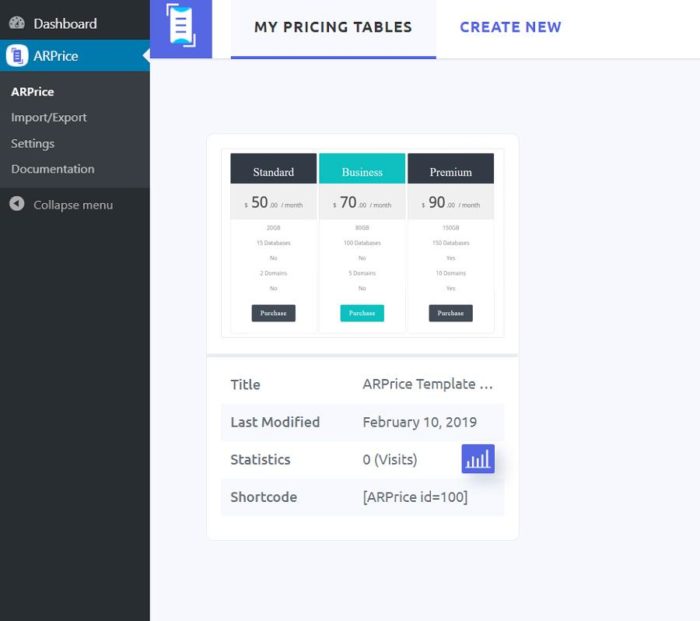
You will see the options for Export/Import, Settings and Documentation on the left side of your dashboard. Let’s explore the settings tab first.
You will see this page opening with a blank box to add your Global Custom CSS. This field is optional. If you are a beginner feel free to skip this option. The advanced users, however, can use it as an added advantage by typing in their own CSS codes to design the fields.
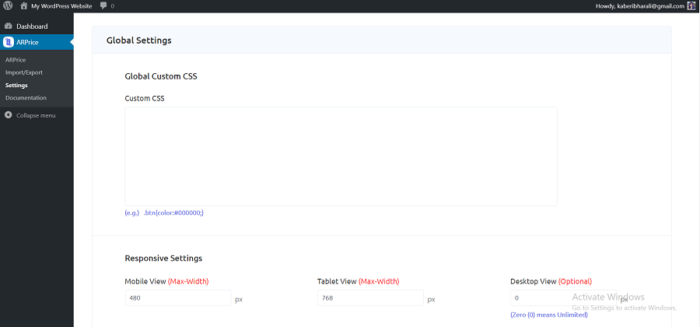
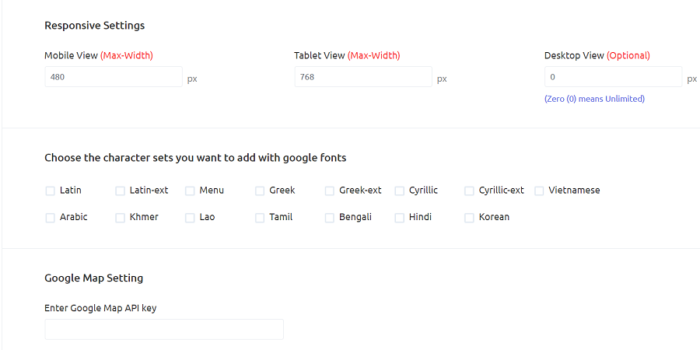
The next option is to set up the width of your tables. So depending on the device, you can set up different numbers, so you know for sure how it appears on a particular screen. Here you have three different fields. One for the mobile view, tablet view, and desktop view.
Below that you can select the character set that you want to use on your tables. You have about 15 options here. You can skip this field if you are using the default English language.
You also have the field to add your Google Map API key, just in case you plan to add it to your tables.
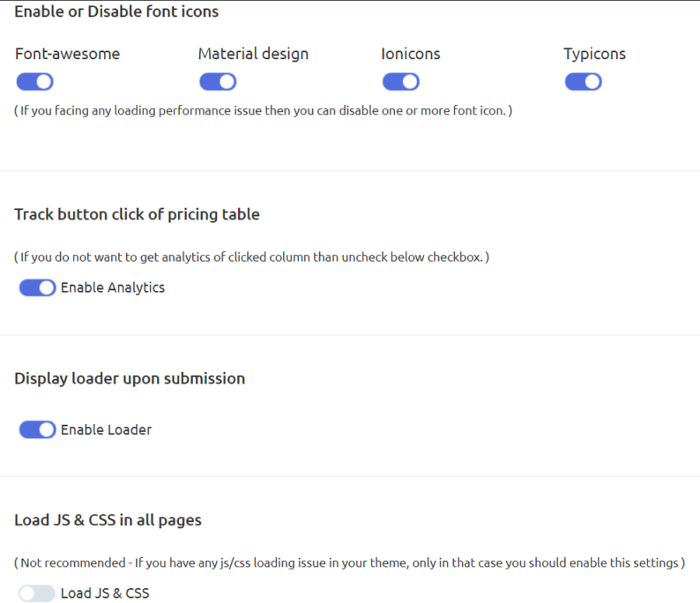
Scrolling further down this page, you have more options for your tables. You can enable/disable one or more of the font icons, analytics for the number of clicks on your tables, loader icon upon form submission and loading the JS and CSS. Depending on your requirements and preference you can enable or disable each of these options.
Once you are done working on the settings, save your changes, so you don’t lose it.
Creating A Table With ARPrice
To create a new table, just go to ARPrice and then click on the Create New button on the top.
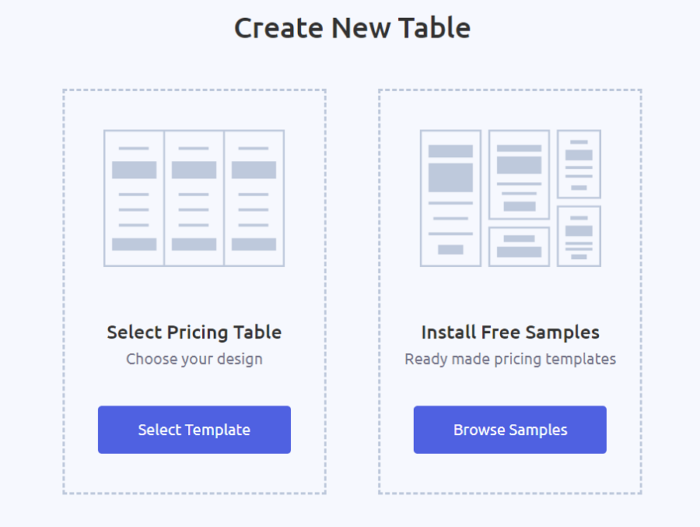
Now you will have a new screen with the following options. Let’s check the first option that says Select Pricing Table.
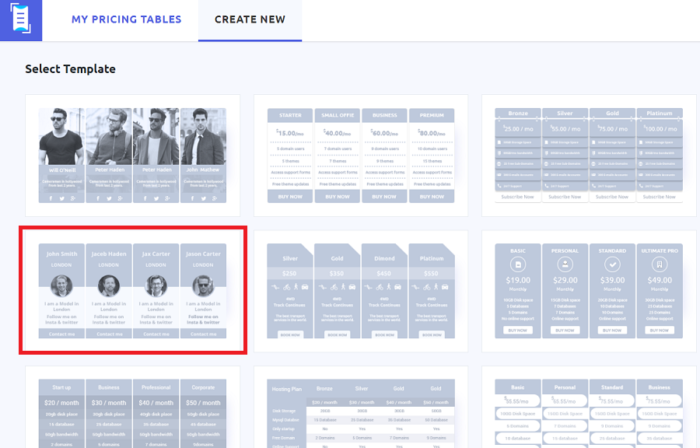
On selecting this option will give you more than 20 different templates options to choose from. Each comes with a different design. Pick the one you like the best. They are displayed in a monochromic format, but upon selecting it, the color automatically changes to a brighter one.
Let me select my favorite option here. You will see the magic now.
The selected template will now expand to fit your screen size with a lot of customization options on the top. The plugin gives you total control over the way your form will appear to your visitors. You can either use it directly as it is or edit it to make it more appealing and to meet your requirements.
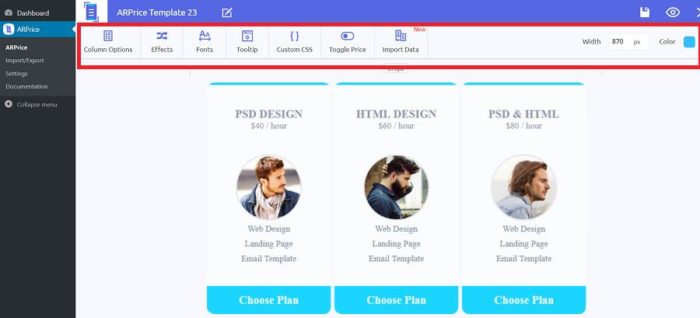
Let’s edit the one we just selected. You can use the option on your top to change the columns, add effects, fonts, tooltips, add CSS, etc.
Each of these tabs comes with an extensive list of customization options for you. For example, the columns option will offer you options to adjust the column sizes, hide/display column sections, work on the column and row borders and opacity, etc.
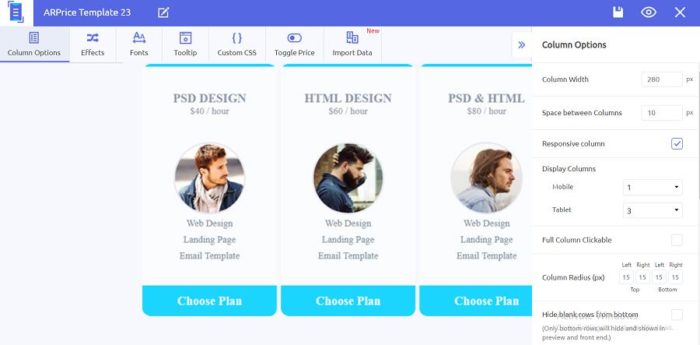
Similarly, the effects tab lets you add column shadow, transition speed, column rotation effects, autoplay and a lot more. You can click on each of these tabs and play around with your creativity to bring out the best in the forms.
Customizing The Templates
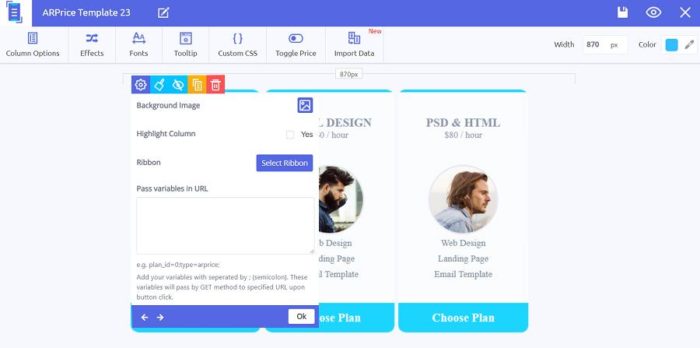
Now if you hover over your table, you will see various options to make your changes. The settings option gives you the following. You can use it to add a background image, highlight a column, select ribbons and do a lot more.
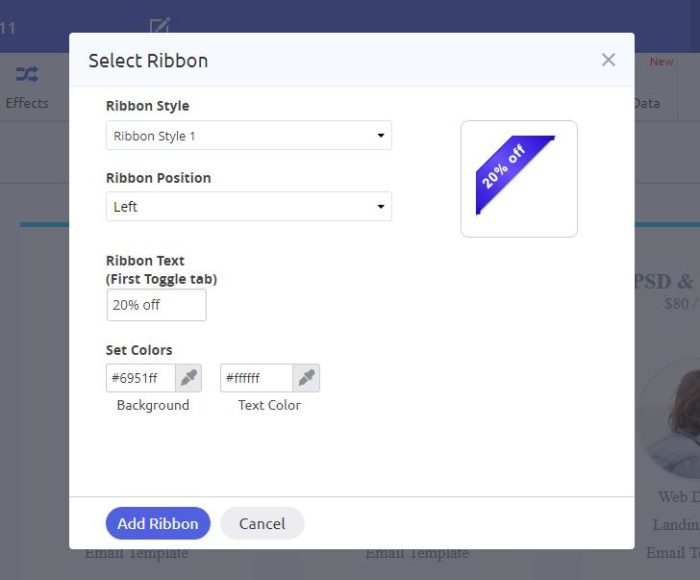
If you want a ribbon, just click on the given option and you will be taken to the following window. Here you can select the Ribbon style, alignment position, and the background and text color. You can have a preview of the ribbon to your right as you work on it. Click on the Add Ribbon button for it to display on your form.
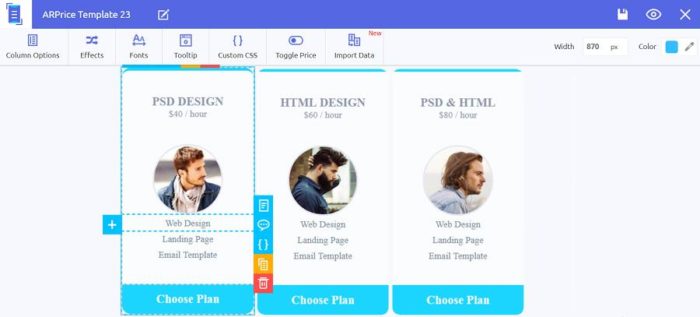
If you want to change the description, just hover over it and you will have an option for that. Click on it and make the change.
You can go ahead changing things in these pre-built templates. From color, font, alignment, adding columns even adding CSS the plugin lets you do everything to meet your requirements.
You also have the option to add a link to your form.
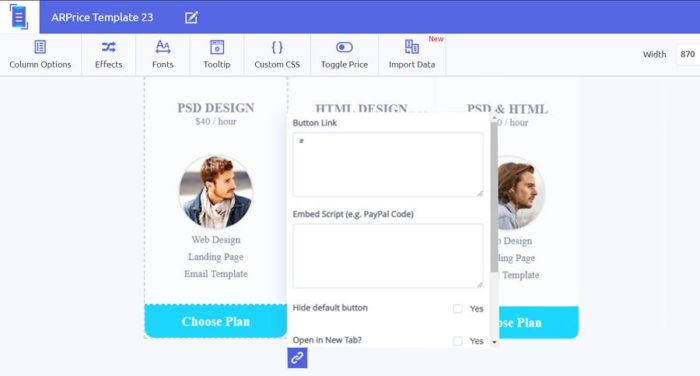
For a better browsing experience, it also lets you select options to add a no-follow link, open the form in another window and so on.
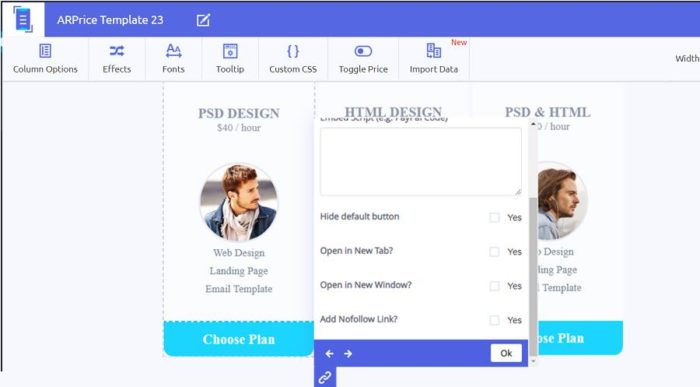
The only thing to remember here is to click on the Save changes options, so your changes remain intact. The saved table will now be automatically added to the My Pricing Tables list which can be readily picked to add to the website.
Installing Free Samples
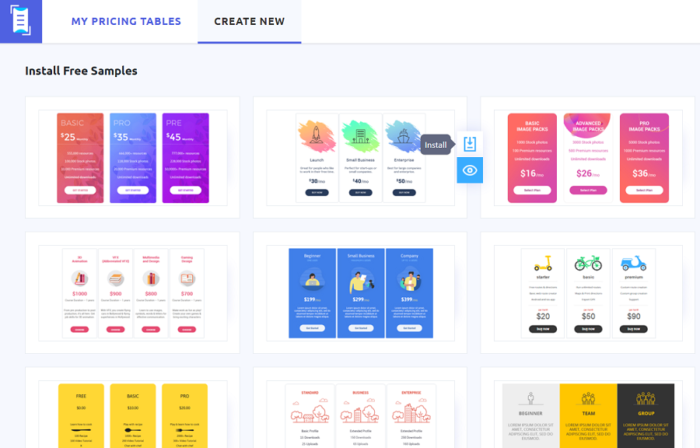
ARPrice offers a lot of templates that are ready to be installed on your website. You can browse through the samples by going to ARPrice dashboard>Create New> Install Free Samples.
Hover over the one that you want to install and click on the Install button to start using it. By clicking on the eye icon, you can have a quick preview of the form before installing it.
Publishing Your First Form
ARPrice offers two different ways to publish your form.
Publishing it via shortcode
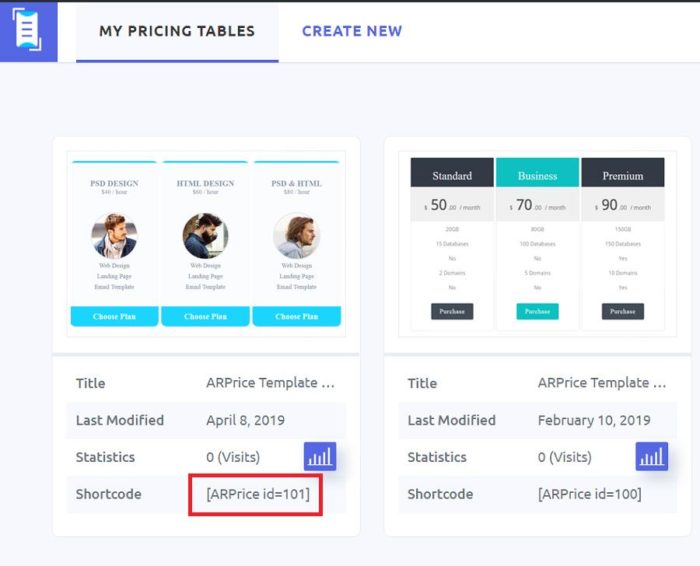
For this option, you will have to go to My Pricing Tables. Now you will see all the tables that you have created so far. Copy the shortcode of the table of your choice and paste it on the page in which you want your table to reflect. On saving the page, you will see the form displayed on your site.
Widgets
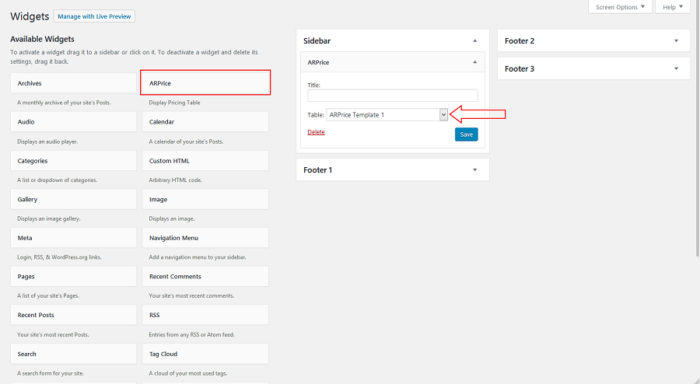
You can also display it on the sidebar of your website. For that go to Appearance>Widgets>ARPrice. Here you just need to drag and drop it into your sidebar or other custom section and select your pricing table from drop-down arrow.
Export/Import Templates
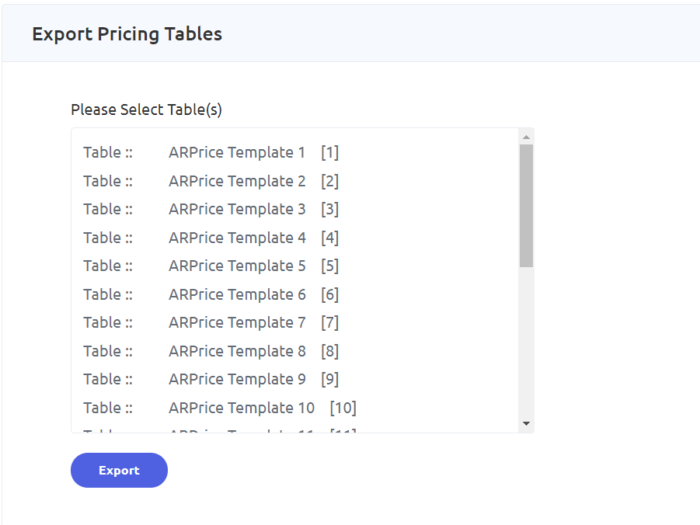
ARPrice lets you export your templates to another website and import templates from other sites to your website as well. To export a form go to the plugin dashboard and click on the Import/Export option on your left. You will have a list of all your tables. The inbuilt ones will be prefixed with Table:: and the customized ones with Table::. You will also see a unique id against each in the brackets. You can either select one or more of these tables and click on the Export button for the files to be downloaded.you can then upload these files on any website that you want.
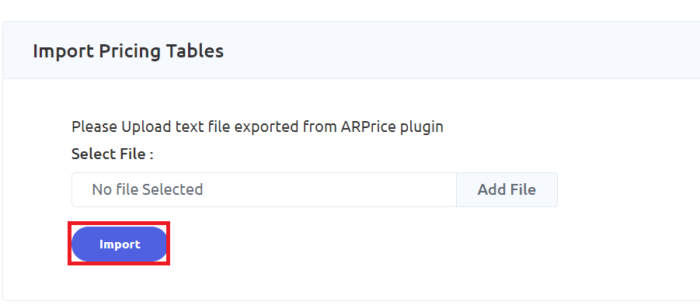
To import the templates, upload the text file exported from ARPrice and click on Import button. Your work will be done in a matter of seconds.
Documentation
The plugin is easy to install, setup and customize. You can also access the documentation if you have trouble using the plugin at any step. It has been extensively documented for its users, and the documentation answers every question that might come your way.
Also Read: ARForms Review – Best WordPress Contact Form Plugin
Pricing
You can have all of the features discussed above by paying just $23. This includes six months of support from the author. You can chip in an extra $6.75 and avail extended support of 12 months.
The plugin also has a free version so if you are not willing to spend the $23 right away, set your hands on the free one. If you think it is worth an upgrade, then go ahead try out the paid version.
Conclusion
ARPrice is a beautiful addition in the WordPress plugins directory, and people have loved it for the flexibility it offers. Not only does it let you use more than 300 beautifully designed pre-built free templates but also lets you have full control over it with its extensive customization options. That’s not something that too many pricing table plugins will offer. So do try it out now and see how it transforms your form building experience.

