


Moving a client to a new server is a part of the job that can come up from time to time. There have been a surprising number of clients that I have met who were hosting with their web developers. This was an old way to make a lot of money with a client – the whole idea is you would build a website for them for let’s say $1,000 – then you would charge them $50p/m for hosting – but the hosting would literally be a server in your garage that cost you $100p/m to maintain and you could have 100 clients on there.
The problem is – anytime I get one of these clients – I know right away when the developer has screwed them over on hosting.
You see as a cost-benefit analysis goes it’s just much better to go with a reputable hosting company. What ends up happening is these clients have bad support for their host and an inferior product – not to mention getting overcharged. It would make sense as to why a client would want to move away from their previous developer’s hosting once they make a switch to a new web developer.
Moving to a new host is not always straightforward though – so I wanted to show you how I do it and some mistakes you could make.
Step 1: Install Wordpress On New Host
There hasn’t been a single cPanel I’ve used that didn’t allow installation of Wordpress. Simply go to cPanel and you’ll see an option somewhere to install Wordpress. You’ll go through the standard Installatron/Softalicious installation.
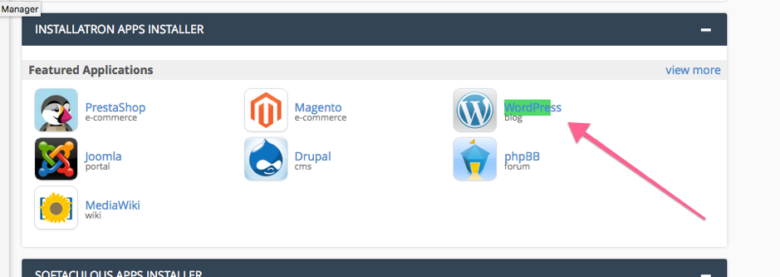
Here – everything is straightforward

The only thing you need to be concerned with is installing Wordpress on the root domain and not in a subdomain (sometimes it sets the directory to be ‘wp’ by default or something like that).
Don’t worry too much about what the Site Title and other options like this would be because you’ll be overwriting the database.
Step 2: Make a Backup of the wp-content and Move Over
What you need to do now is go to the old host and make a backup of the wp-content folder (which I’ll show you how to do in a sec) – and the database. With the wp-content folder simply go to the public_html folder and right-click on ‘wp-content’ in the File Manager and click on Compress

You’ll have a zip file ready once this is done (if you don’t see it go into another folder and then go back because it may need to refresh the file list). Right-click on this file and click ‘Download’ – then go to the File Manager of your new host and completely delete the wp-content folder in the root, upload the wp-content zip file, extract it and you’re halfway done. Now we need to get the backup of the database.
Step 3: Make a Backup of the Database and Move Over
Transferring the database is a little more tricky – what you need to do is go to phpMyAdmin – select the database from the left and then click Export.
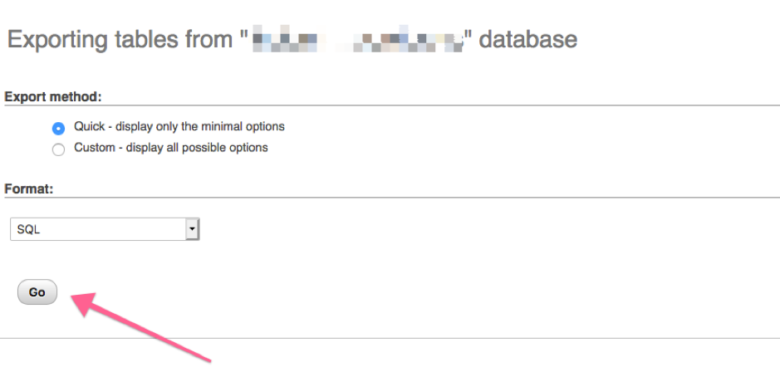
Lucky you – there’s nothing really that complicated here – just click the ‘Go’ button without changing any of the options. Now we need to import the database.
This is going to be a little tricky because you need to not only add the new database and import it but you also need to change some settings in a file called wp-config.php but I’ll guide you through it.
So first things first go into phpMyAdmin – select all the tables in the database and then scroll down to the drop-down and select ‘Drop’
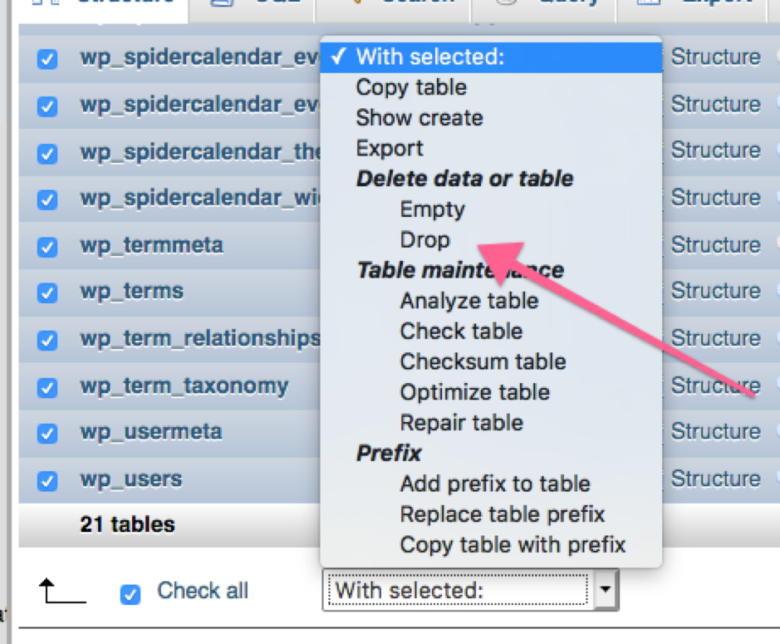
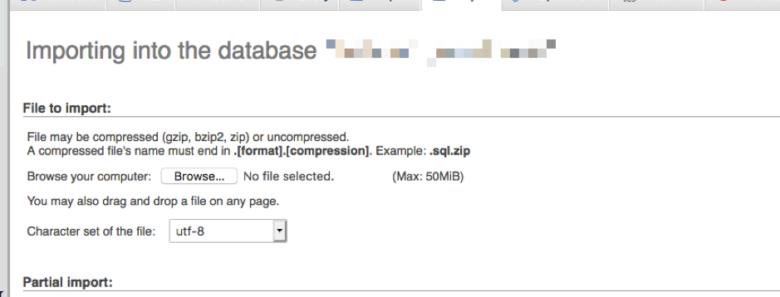
Once you do that all the database tables will be deleted. But don’t worry – just go to ‘Import’ at the top – select the file export of the database (it should be a .sql file) and then click ‘Import’ to import the new database.
After that, all you need to do is take a note of the wp_ prefix. For example below is the standard ‘wp_’ prefix behind every database name:
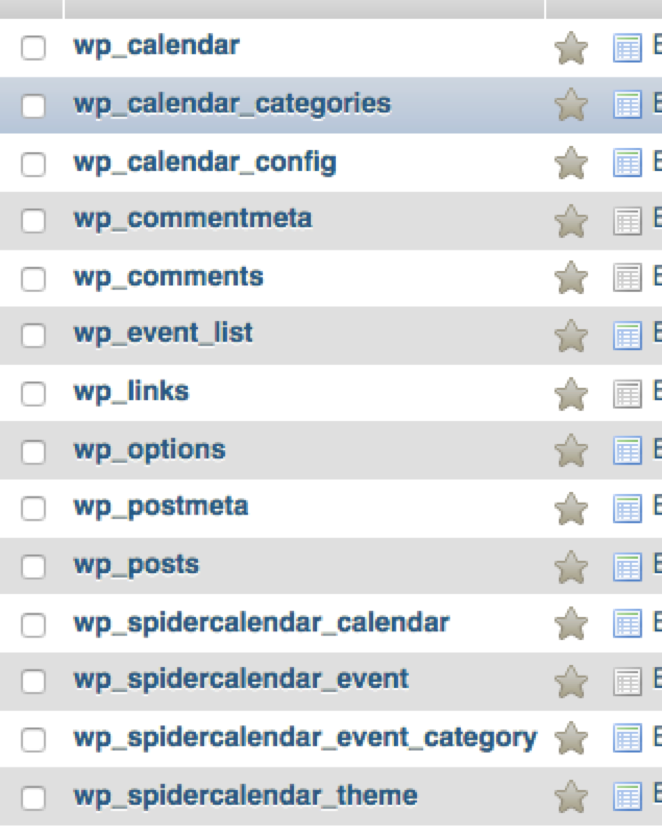
But I’ve seen everything from wpx1_ or anything like that – basically you could have any prefix you want.
Now go into wp-config.php and make sure you change the prefix to whatever is in the database (there should be a constant for it).
Then all you need to do is redirect the name servers to your new domain!
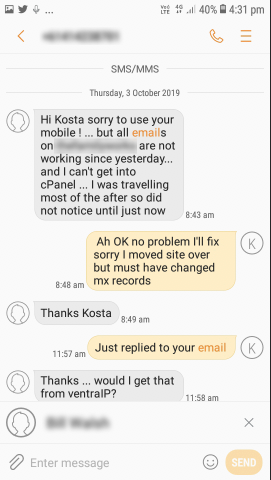
Step 4: Don’t Forget the Mail!
One thing is you don’t want to be receiving SMS messages like this once you transfer the name servers of the domain
Make sure you replicate the name servers from the old cPanel
You can find the MX records in the Zone Editor:
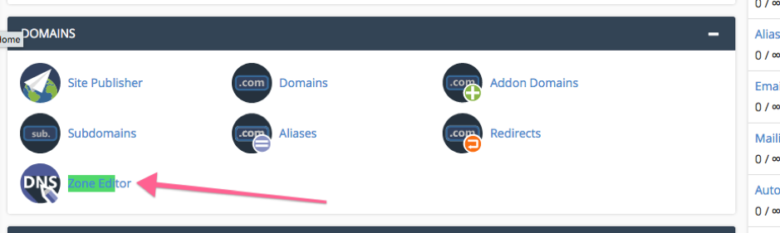
Make sure they are replicated over from the previous cPanel.
Then if you’ve done correctly voila! You have the new site live!
Note: to test if the new site is indeed correct I upload a file called testme.php in the root directory that just echoes out “This is the new site” – then I go myclientdomain.com.au/testme.php to confirm the site has moved over.
Good luck!


Responses (1 )