A WordPress blog has the ability to edit the published date of a post to an earlier date. This WordPress guide shows how to use the Post Timestamp option. This may be useful if you have articles from a static website that you want to incorporate into the archives of your WordPress blog. Or of you want to give your blog a more established look.
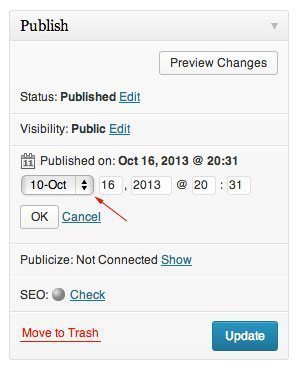
 It is very easy to edit the published or post date of a WordPress post. To do this when creating a new post or editing an existing one, look over to the bottom right side for the Post Timestamp. You can place any date in there you want even back to a date before the blog existed. Your posts will show on the main page in chronological order based on the Timestamp.
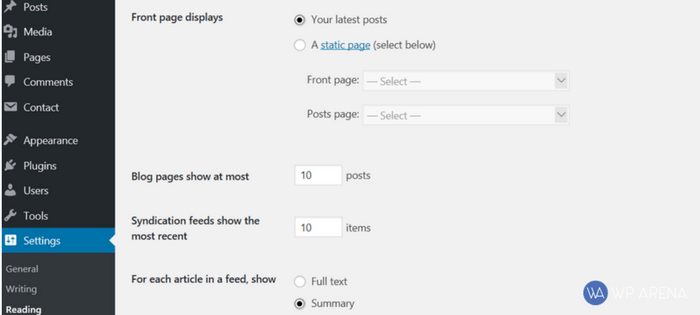
If you don’t have more than 10 posts they may stay on the first page of the blog until enough new posts are made to push them off because a default 10 posts show on the main blog page.
You can specify the number of posts shown on the fist page in Settings –> Reading and under Syndication feeds edit the “Show At Most xx Posts”.

Using the WordPress Post Timestamp is useful to build your blog content quickly but still give it the look of a well-established blog. You can also schedule blog posts to be published in the future. This is what I do when I go on vacation, the blog would operate normally with new content while I am not on the actually blog working. Not to mention if you write 5 blog posts on the weekend, you can schedule them for the week and then focus on marketing your blog all week long instead of writing.
- Up Next To Read: How to Make Your WordPress Blog Better
Do you have any questions on all this? If so, please let me know in the comment box below.


