The WordPress 404 error page or the 404 error message is probably the file or piece of code most neglected by WordPress theme authors. This short WordPress guide will show you how to spruce yours up a bit.
Keeping visitors on your WordPress blog should be one of your main objectives to blogging. When they find themselves on a dead end they may just leave. Why not entice them to look around a bit, redirect them to a different page, or place some AdSense on your 404 page and at least get paid when they leave your site.
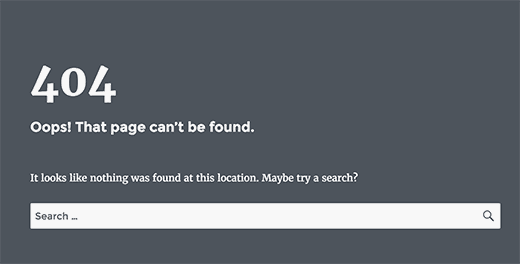
First, check yours out by typing in URL on your blog that you know doesn’t exist. Most WordPress blogs show something like this:

Well, that is really wanting me to do something like… leave! WordPress handles 404 errors differently than an HTML site and creating a 404 redirect in your .htaccess file will not work, at least that I know of. The 404 error that is displayed is theme specific and has to be edited within the theme’s files. So switching themes means these changes will not follow.
Next, determine if you have a separate 404.php file with your theme or if it uses some code in the themes main index file (index.php). From within the WordPress dashboard click Presentation then Theme Editor. Look on the right side for the 404.php file. If you have a 404.php file you can make the changes to it. If you don’t have a separate 404.php file you can create one or make the changes you want in the index.php file.
If you have a current 404.php file and want to redirect visitors to another URL. Or to make your own 404.php file to redirect your visitors to another URL place the following code into a text file, change the URL and save it as 404.php and upload it to your current WordPress themes directory:
<? php
header(“Status: 301 Moved Permanently”);
header(“Location:http://www.ChangeToTheURL.com”);
?>
Now if you want to display something more interesting on your 404 error page you can edit your 404.php file or find where in your index.php file to make the changes. To determine where the code is in the index.php file open it in the Theme Editor and look for this piece of code:
<? php else : //if there were no posts available ?>
You can now edit what you want between that bit of code in your index.php file and the next line of code. You can start by changing the text between the h2 tags shown below:
<h2>Error 404 – Not Found</h2>
You can also add a few links and more text below the h2 tags and even some AdSense code if you want. I added a search box for my blog and some AdSense. Make sure you backup any file you are editing first so if you don’t like your changes or break your blog you can restore it easily.
Well, what started out as a short guide has grown bigger than I thought and there are many other items you can place in the 404 error area of your blog. Just make sure you close all the tags and make a backup before you start hacking the code!


