One of the first things a new WordPress blogger wants to do is make their new WordPress blog look the way they want it to. Adding a cool new WordPress Theme and then maybe even customizing it a bit. But before you add a new theme and start looking for someone to “pimp your blog” I suggest you try several different themes see how they work and look for a while till you are comfortable setting up a theme and customizing it. Once you are sure you like a certain theme, then get that custom header made and installed, and learn how to tweak it over time. This means a custom logo that suites your blog/brand.

Here is a short WordPress guide to help you find and install new WordPress themes very easily through your WordPress Admin panel.
From the WordPress dashboard click Appearance on the main panel. Here you will see the current theme first and other installed themes below it. Simply scroll down and click on the theme you want to use and it will now be active. Now that was simply, wasn’t it?
If you don’t like any of the installed themes and want another just go to WordPress Themes for thousands of free themes to download.
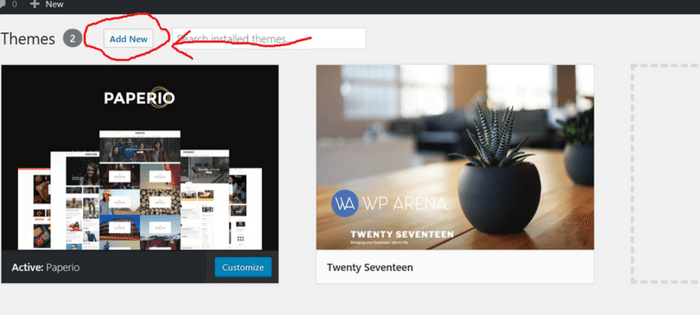
The way I search the WordPress database is through the theme’s internal directory. While in your “appearance” —> theme dashboard, click on “Add new” button. See the below image for direction. You can add in keywords to search for themes but I prefer to do it another way I will talk about very shortly.
You should now see a wide variety of selections and the menu bar you can filter out themes to make few selections appear but ones that you are actually looking for.
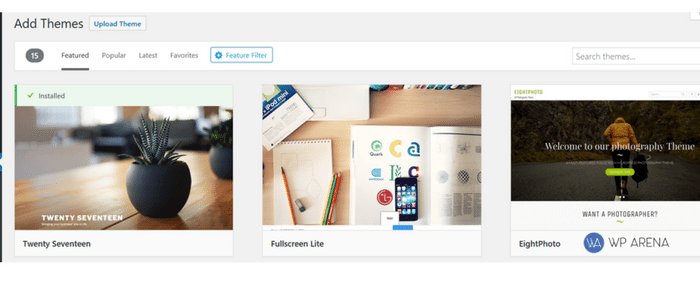
Just click on the filter option because this will help show results for themes that very much interest you. It’s easy to install that theme as well, just click the install button when hovering over a theme preview. Do view the demo version before installing one.
Another way to find WordPress themes is by doing a simple Google search for “WordPress themes”. After you download a theme to your computer do not unzip it.
Upload it view your “appearance” –> “Themes” section. Click on the “add new” button then the upload theme button to upload a .zip file of a theme you downloaded to your computer.
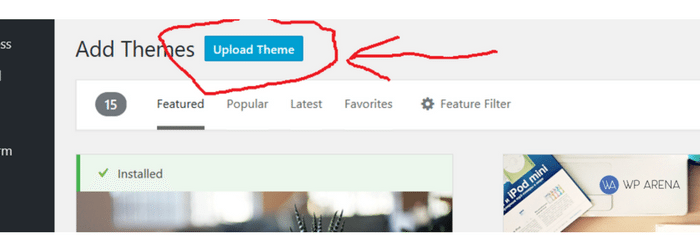
Now click the browse button to find the .zip file on your desktop. Just follow directions after this to install the theme.

Go back to the Themes sub panel and activate the theme it if it isn’t already activated.
I highly suggest choosing a theme that is “Widget ready”. You can sort themes at WordPress Themes for only “Widget ready” themes but at times a few that aren’t will get through. Also use the “filter themes” option I mentioned above to find themes with widget ready available. The only real way to see if a theme is “Widget ready” is to activate the theme and look for a Widgets subpanel next to the Themes subpanel or view the demo version.
While we are talking about themes and are in the Appearance panel you should also see the following subpanels or more depending on the currently activated plugins.
The Theme Editor shows the code for the current theme; on the right side are the different templates related to the current theme. You can make changes to the theme’s templates here if you know how but that is beyond the realm of this tutorial.

Just keep in mind if you plan on messing around in here be sure to copy the contents of the file to a safe location BEFORE you do anything. If you do make a mistake paste the unedited code you saved back into the editor. If you can’t change it back you will need to delete the file you changed and upload an unedited version to your web host again. The other subpanel items in here are self-explanatory. In the future, I may explain how to change the header image and make other minor changes, or if you want to search Google or go to www.WordPress.org for more information.


