If you’ve ever used WordPress as either a personal blogging platform or a flexible solution to meet the needs for your company’s online presence, you know how easy this tool is to work with.
But for those of you weaned on the WordPress 4.x iterations, the upgrade to the new 5.x releases might be a bit of a shock to the system. Instead of that tried-and-true TinyMCE WYSIWYG (What You See Is What You Get) editor, WordPress has opted for a completely new take on the post editor.
This new editor, called Gutenberg, takes a very different approach to how you create and edit posts with WordPress. And although it might seem a bit overwhelming at first, the new editor was created with absolute simplicity and modularity in mind. With this new tool, everyone can create fantastic WordPress entries quickly.
Why the change?
First and foremost, why did WordPress make such a dramatic change in its editor? The decision was made to go with an editor that is more visual in nature, such that those who are less technically inclined wouldn’t have any trouble building a website.
With Gutenberg, the creation of posts migrated from text boxes to blocks. The previous editor ran on a PHP/HTML/CSS platform and did not allow for a visual editing experience. TinyMCE was a text-based editor, and unless the user had coding experience, the customization of pages and posts was nearly impossible. You were limited in what you could do, because of the less-than-flexible editor.
With TinyMCE, you created a post with a title and a body. You could add images and videos inline, and that was about it. You couldn’t customize the layout of the post or page. You were locked in.
With Gutenberg, you are in control of how the page or post is laid out. By breaking everything into blocks, you decide where each block goes and what each of them contains. It’s flexible and far superior to the original editor.
But how do you use it? Let’s find out.
How to use Gutenberg
Remember, it’s all about blocks. Whether you’re creating a post or a page, you do so block by block. When you go to create a new post, you’ll find a default title block (which is required) already there (Figure 1).

The default title block in Gutenberg.
Type the title for your new post and then click anywhere outside of that block to reveal the Add Block button (Figure 2).

We can now add a new block to the post.
Click the + button to reveal the block selector (Figure 3).

The Gutenberg block selector.
It is important that you get to know the block selector. If you scroll through the listings within, you’ll find the blocks have been categorized by:
- Most used – the blocks you use most.
- Common blocks – such as paragraph, image, list, contact forms, heading, and quote.
- Formatting – such as custom HTML, code, classic, preformatted, and table.
- Layout Elements – such as page break, buttons, columns, group, and separator.
- Widgets – for various plugins you’ve installed.
- Embeds – such as Twitter, Youtube, Facebook, Instagram, and Spotify.
You might also find other categories, from plugins such as Atomic Blocks and WooCommerce. This will depend on how much customization you’ve done to your WordPress site, especially if you’ve hired an application development company to create a custom plugin for your site.
From that menu of blocks, select what you want to add next, and it will appear, ready for you to add content to the block (Figure 4).
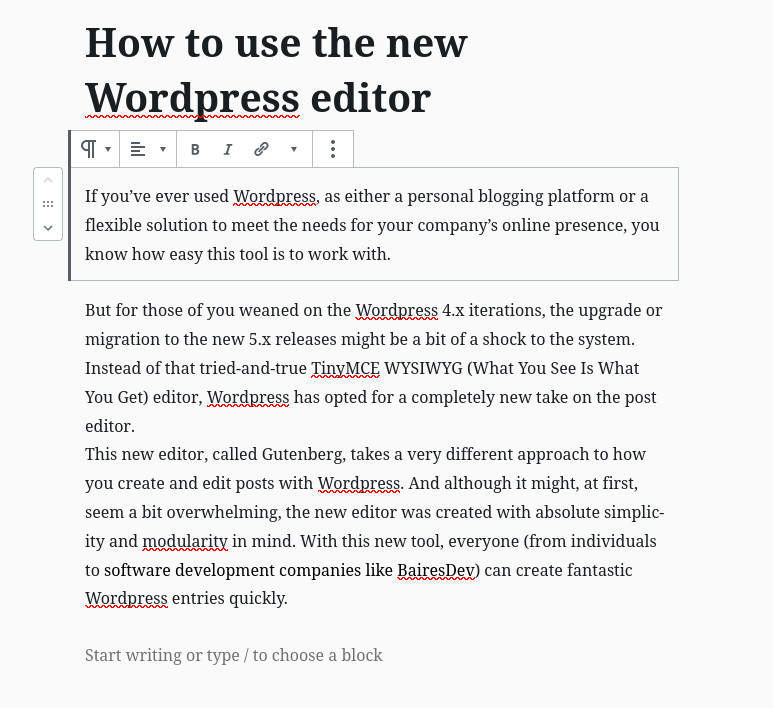
We’ve added a Paragraph block to the post.
One interesting aspect of the Paragraph block reveals itself when you hit the return key (or copy/paste a multi-paragraph section of text). As you can see, in Figure 5, the three paragraphs copied and pasted as a Paragraph block actually appears as three individual blocks.

A multi-block copy and paste job.
By separating the copy/paste into individual blocks, it makes it possible to do things like move each block around, give each block unique formatting and even duplicate blocks.
Once you’ve added that block, click the + button again to add another block. You can even hover your mouse over a block to reveal the Add Block button, so you can add new blocks between existing blocks (Figure 6).

Adding a new block between existing blocks.
You could select to add an Image block between existing blocks. To do that, hover your mouse over the top block and click the + button. Select image from the Common Blocks section and then either click the Upload, Media Library, or Insert from the URL button to add your image (Figure 7).
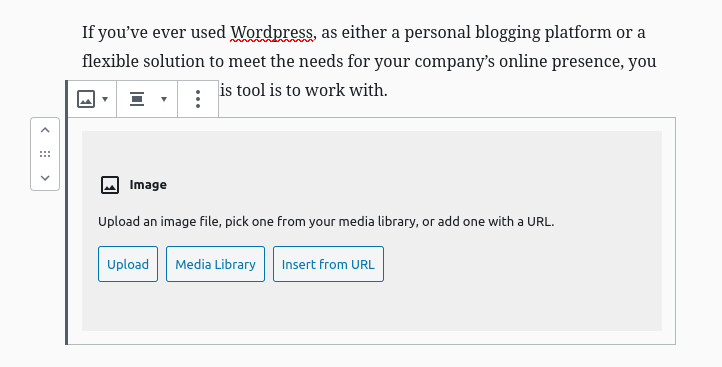
Adding an image block from within Gutenberg.
Continue on, adding blocks in this same fashion. Once you’ve added the last block, and are happy with your post or page, click the Publish button in the upper right corner, and your post is ready for public consumption.
Conclusion
You don’t have to fear the new WordPress Gutenberg editor. Although this new method of creating posts is drastically different than the previous editor, you won’t just find it easier to use, but exponentially more flexible – once you get the hang of it, that is.


