In recent times, there has been a huge surge in WordPress usage; this increase naturally requires an improvement in the security issues. So there is a Penetration Test or occasionally PenTest, which can help you to check the Vulnerabilities of a WordPress site.
Let’s have a look at Penetration test in simple words; A penetration test is a simulation of a malicious attack (often called a hacker: a Security expert) on a network, system, application or website, used to discover existing vulnerabilities and weaknesses before crackers find and exploit them.
In other words, a penetration test is an independent security evaluation of your Website, Network, and System infrastructure. Before sharing this information and knowledge, I would like to remind critical disclaimer. I will not be responsible for any of your action and disclaim all the liabilities in respect to this bit of writing which is just for learning purposes. PenTest is divided into two series.
Part 1
How to Create a WordPres Powered website on Local Machine
For learning purpose we will work only on Virtual machines, so first get the Virtual platform as I have got VMware Workstation, you can select Virtual Box from Oracle as well. Download one of them and install on your machine.
We are creating two virtual machines; one will act as a Server for hosting all the necessary file and shall serve as a Victim machine, while the other one will be a backtrack. Both are Linux base, don’t worry if you don’t know how to use Linux, for this tutorial I will cover all the necessary things which are required to do a penetration test.
Meanwhile, you can attack any website which is using WordPress as CMS: Like other Content management systems on the web, WordPress is regularly updating to make it more secure. Security should always be a primary concern when using the WordPress as CSM.
After installing the VMware Workstation or VirtualBox, get the CentOS and Backtrack, other than CentOS you can use other Linux flavors like Ubuntu. After installing the OS on your Virtual box now ready to install the backend for WordPress powered site.
To set up a WordPress powered website, we need Apache server, MySQL, PHP, to install the MySQL on Server machine have done the following command on Terminal:
Go to Application > Accessories and click on Terminal, it will open the terminal box:
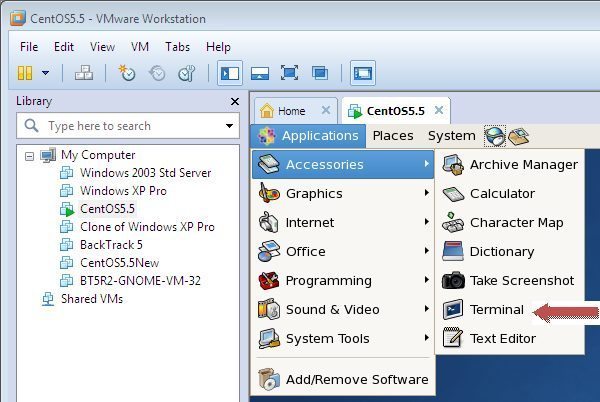
Under terminal type the following command to install the MySQL on the server.
# yum install mysql mysql-server
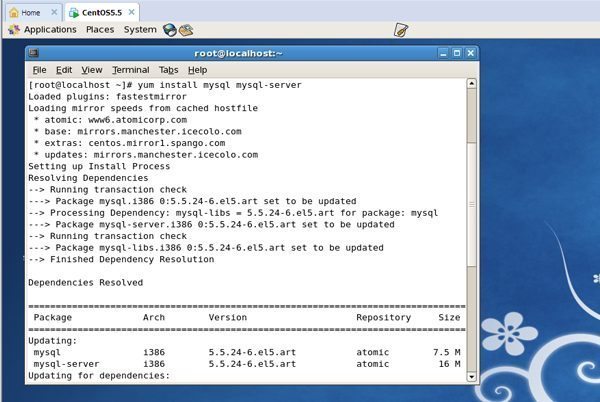
After installation starts the server as:
# service mysqld start
PHPMyAdmin is the best way to manage the MySQL database, so installed it on the local server and created database and data users, and install it by running this command:
# yum install phpmyadmin
Now install the apache server by running this command in terminal:
# yum install httpd
After installation, run the service:
# service httpd start
Open the browser and open the link http://localhost/phpmyadmin and create the database, it will ask you to provide root username and password:
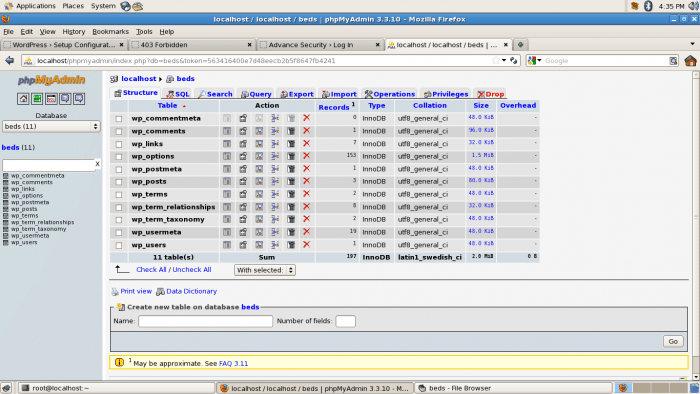
Enter the password when prompted and created the database through PHPMyAdmin.
Database created now got the WordPress as follow:
Create a new folder and Download the WordPress software in a folder /var/www/html/wordpress/ and unzip it.
# mkdir /var/www/html/wordpress
Go to the created folder by this command:
# cd /var/www/html/wordpress/
and run the following command to download the WorPress here and unzip it:
# wget https://wordpress.org/latest.tar.gz
# tar -xzvf latest.tar.gz
In a web browser open the localhost to install the WordPress on created folder:
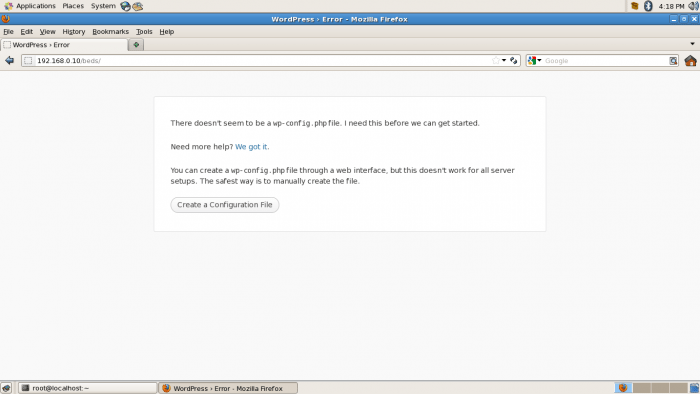
Prompted and requested to provide the database name and password, user admin’s name and password for admin:
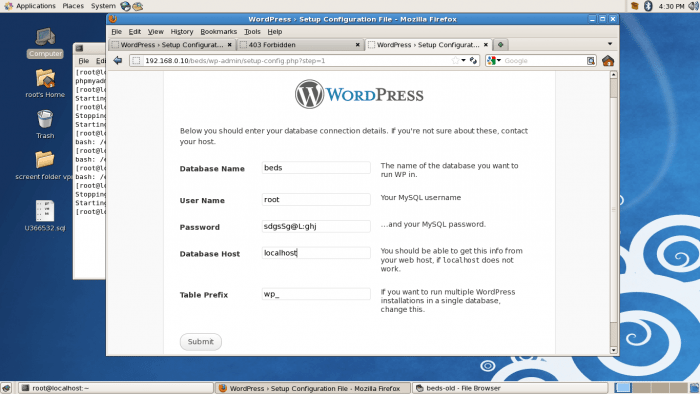
This process should create the wp-config file contain all the database information, but it gave an error that unable to create the wp-config.php file so run following command to change the folder ownership:
# chown apache:apache /var/www/html/wordpress –R
or manually copy and paste the code and create the wp-config.php file.
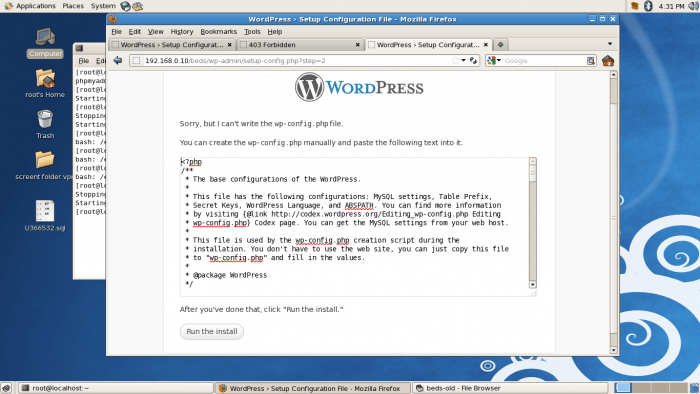
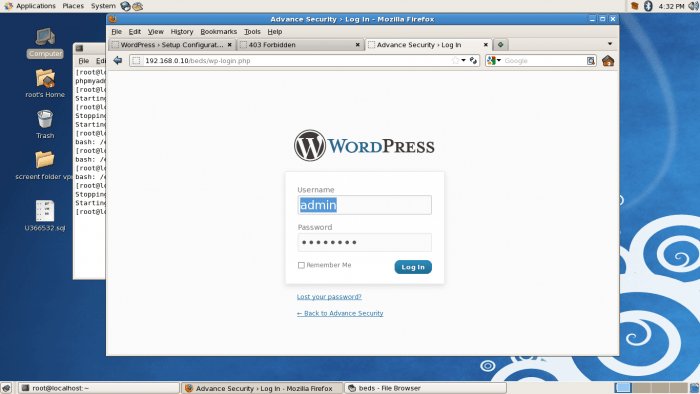
As well it offers to create the wp-config file so created the one manually and it created the installed CMS login to the admin panel. We have installed WordPress in beds folder and in a browser enter the IP address or with localhost as following localhost/beds/wp-admin to enter into central admin area and site is running on a local server.
After installing WordPress on Server machine, our Victim box is ready for attack and doing a penetration test for WordPress powered site Part 2 below.
Part 2
In “Part 1” above, we have explained how to set up the platform for doing a “Pen Test”, and in this section, we will give you a brief explanation about “How to do Penetration Test for your WordPress Powered Website.”
The primary goal of the conducted attack is to simulate a malicious response which can engage to identify the vulnerabilities on the password protected page. As well as to determine the harmful impact due to security breaches on the integrity of website system, and to check the confidentiality of customer’s data and information on the system. We have used the OWASP (Open Web Application Security Project) methodology and followed the recommendations on behalf of NIST SP 800-115 (NIST, 2008)
During the attack we have discovered that the target system contains the latest version of WordPress installed on a web server, for scanning we have used WPscan tool which produces the report showing that there are Multiple CSRF Vulnerabilities so we can attack a target to change post title, manage the Administrators/users accounts along with emails, can redirect site to another URL, possible to change posts, can customize the theme, insert our header image.
Before using Armitage and doing exploitation by using Multiple CSRF Vulnerabilities, we have run a WPScan to enumerate the plugin lists and user list. WPScan is a security scanner which is written in Ruby, and it’s licensed comes under GPLv3 (Dewhurst, 2011). This black box scanner helped us to find weaknesses in the installed system and have done the following enumeration through Security Scanner:
WPScan is a black box WordPress Security Scanner written in Ruby which attempts to find known security weaknesses within WordPress installations . Its intended use it to be for security professionals or WordPress administrators to asses the security posture of their WordPress installations. The code base is Open Source and licensed under the GPLv3.
Features include:
- Username enumeration (from ?author)
- Weak password cracking (multithreaded)
- Version enumeration (from generator meta tag)
- Vulnerability enumeration (based on version)
- Plugin enumeration (todo)
- Plugin vulnerability enumeration (based on version) (todo)
- Other miscellaneous checks
Exploitation on Local Server
- Have done the all user list enumeration as follow:
Ruby ./wpscan.rb –url http://192.168.0.10/ — enumerate u
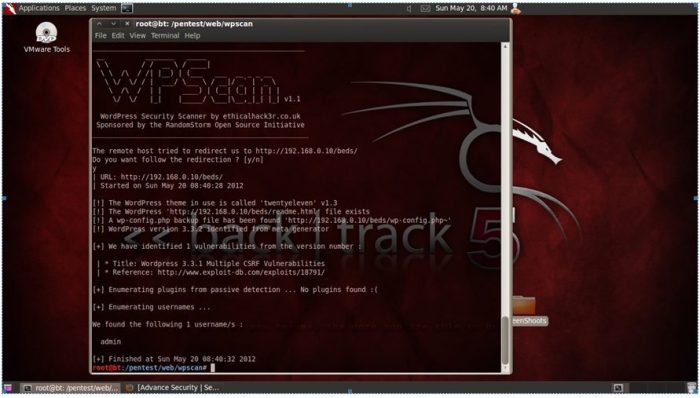
- For Plugin enumeration run the following command:
Ruby ./wpscan.rb –url http://192.168.0.10/ — enumerate p
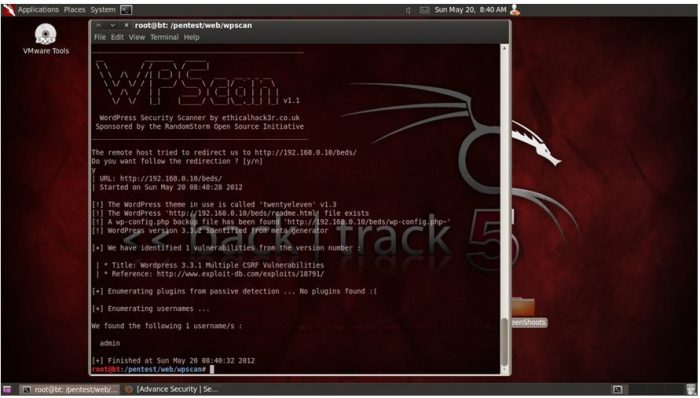
After running these enumerations, we have got admin username as “admin” and installed plugins list. We have made a file which contains Password list and runs the brute force attack using Password Dictionary, as save a password containing the file in a folder /pentest/web/wpscan and run the following command to do brute force attack on password protected pages:
Ruby ./wpscan.rb –url http://192.168.0.10/ –wordlist pass.txt –username admin
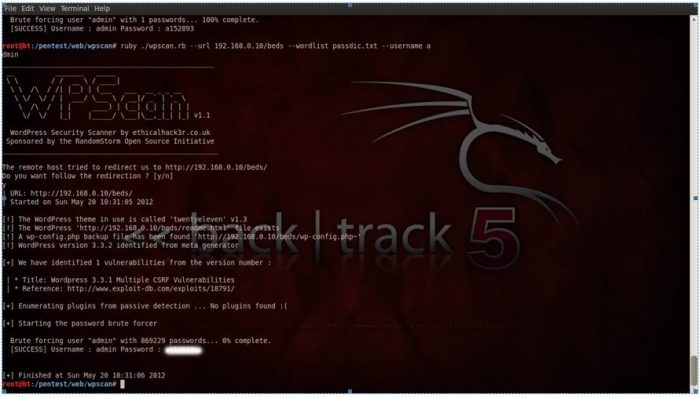
If someone gets a hold admin accounts, then you are at risk of identity theft and hijacking of your WordPress Powered website. Anyone who breaks into your account could steal your private content, post spam, steal your WordPress account or use it to gather email addresses to send spam to others.
We have got the administration level access through this attack, means we have full control over the WordPress installed Website. After this test, we have done HTTP-DoS attack for exploitation and used Armitage as well to identify further vulnerabilities to protect the server from attackers.
Penetration Test through Armitage
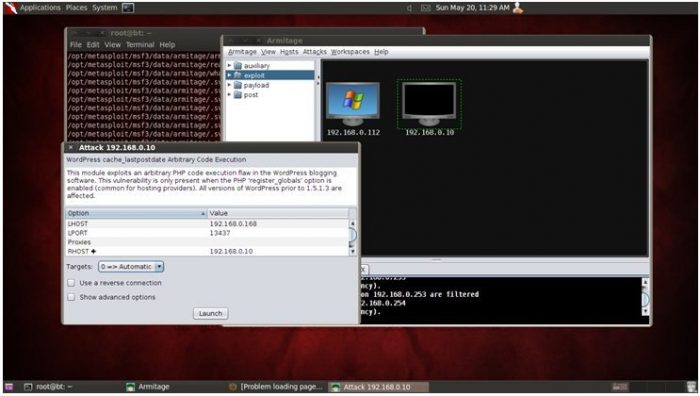
After connecting to the Armitage in a BackTrack run this command to add host machines as one is Server and other is Windows XP Client machine for attack:
msf > db_nmap –sT –Pn –T5 –o –open 192.168.0.10
msf > db_nmap –sT –Pn –T5 –o –open 192.168.0.112
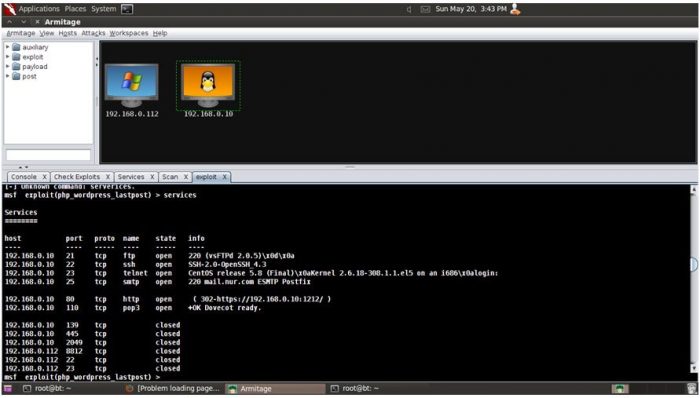
After connecting to the host, run the scan and services to know which port is open and which one is filtered.
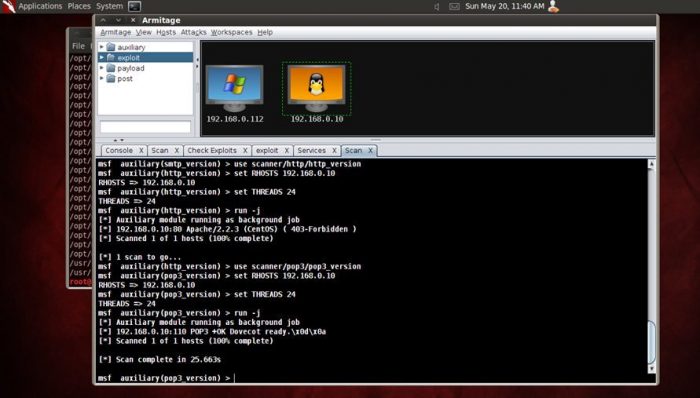
Countermeasures and Recommendations:
- Always update the WordPress installation to the latest version
- Protect the wp-config.php file and add the following piece of code in .htaccess File:
Change access right to wp-config.php file as:
# protect wp config.php
<files wp-config.php>
order allow,deny
deny from all </files>
- Disabled the php.ini function which is not required
- To protect from the Brute-force attack; reduces or limit the login attempts through plugins like Limit Login Attempts. (Login Ninja)
- Make a strong password
- Always update to date installed Plugins
- Do not use database with root username and make strong password
- Make log file for errors and take proper action to prevent this happened in future.
Risk Rating
The result of this penetration test shows that the Password Protect website is high on risk from attackers who can damage the company website and by exploiting the web server can get the operation control to have financial or other benefits.
At the end of this test, we can conclude that there are security breaches which can harmful for the integrity of Company’s assets, the data confidentiality is at high risk. We have done the penetration test successfully and came to know that the attackers can determine the vulnerabilities to create damaging events. The attacker can have control over the whole system, so there is a need to take proper security counter-measures as mentioned above.
WordPress Security Plugins
- S3Vault
- Security Ninja
- WordPress Safer Admin Plugin
- Restrict Content Pro – PayPal Pro and Express
Useful links:
- How To Find, Remove and Protect WordPress site from Malware
- How To Protect WordPress Powered Site from Brute Force Attack
After installing WordPress on Server machine, Victim box is ready for attack, and you can do a penetration test for WordPress powered site.
Follow WPArena on Twitter and Facebook fan’s page for further security updates.


